To replace moldy caulk around your bathtub, start by carefully cutting and removing the old caulk with a utility knife or caulk removal tool, being cautious not to scratch the surface. Clean the area thoroughly with a mold-inhibiting cleaner and let it dry completely. Apply a high-quality, mold-resistant caulk smoothly along the seam, smoothing it with a caulk finishing tool or finger. For detailed steps and tips, continue with the process to guarantee a clean, mold-free finish.
Key Takeaways
- Remove old caulk using a utility knife or caulk remover, ensuring all residue is cleared for proper adhesion.
- Clean and disinfect the area thoroughly with a mold-removal solution, then let it dry completely.
- Choose a high-quality, mold-resistant caulk and apply smoothly, pressing into the joint with a caulk finishing tool.
- Allow the new caulk to cure fully before using the bathtub to ensure durability and seal integrity.
- Regularly inspect and maintain caulk lines, keeping the area dry and ventilated to prevent mold recurrence.
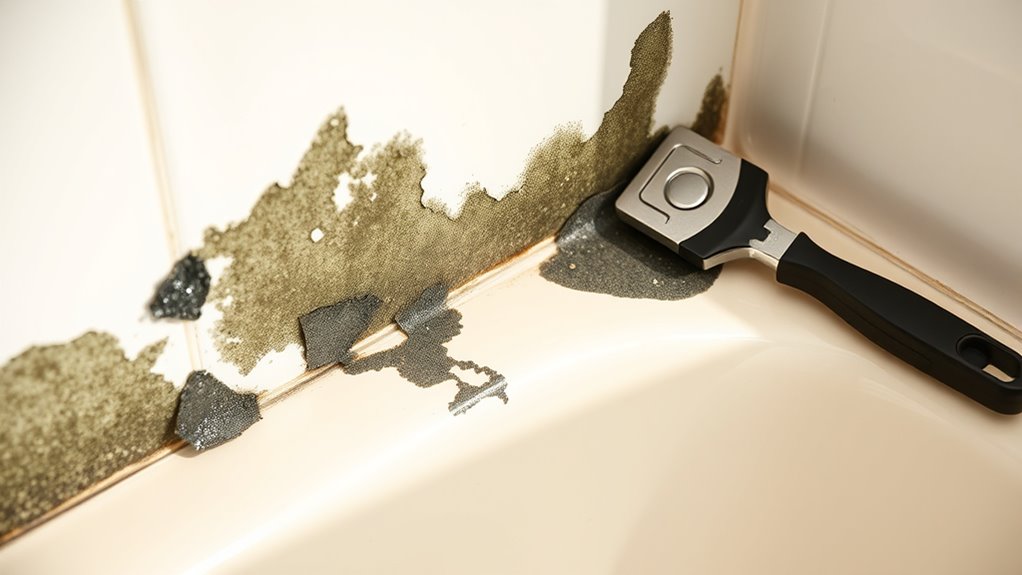
Moldy caulk not only looks unsightly but can also lead to health issues if left untreated. When you notice black or greenish spots along your bathtub edges, it’s a clear sign that it’s time for caulk removal and mold cleaning. Mold thrives in damp environments, and old, cracked caulk provides the perfect breeding ground. Ignoring this problem can worsen the mold growth and potentially cause respiratory issues or allergic reactions. Taking action promptly will improve both the appearance of your bathroom and your health.
Moldy caulk signals health risks and bathroom deterioration; address it promptly for a cleaner, healthier space.
Start by carefully removing the old, moldy caulk. Use a utility knife or a caulk removal tool to gently cut along the edges. Be cautious not to scratch the bathtub surface. Once the bulk of the caulk is loosened, use a caulk remover or a heat gun to soften any stubborn parts. This will make the removal easier and prevent damage. As you pull away the caulk, ensure you get rid of all the residue, since leftover debris can prevent new caulk from adhering properly. After removal, inspect the area thoroughly and clean it with a strong mold cleaning solution. Use a mixture of bleach and water or a commercial mold remover to eliminate all mold spores. Scrubbing with a brush helps dislodge any remaining mold and dirt, ensuring the surface is clean and dry before recaulking. Proper cleaning is vital because mold can embed itself deep into porous surfaces or behind the caulk. After disinfecting, rinse the area thoroughly and let it dry completely. Moisture is the enemy here; a dry surface will help your new caulk stick better and prevent mold from returning. Once dry, you’re ready to recaulk. Choose a high-quality, mold-resistant caulk designed for bathrooms. Apply it smoothly along the seam, pressing it into the joint with a caulk finishing tool or your finger dipped in water. Smooth out the bead for a clean, professional look. Allow the caulk to cure as per the manufacturer’s instructions before using the tub again to ensure it forms a proper seal.
Replacing moldy caulk is a straightforward process if you follow these steps carefully. Removing old caulk and thoroughly cleaning mold not only enhances your bathroom’s appearance but also creates a healthier environment. Regular maintenance, like inspecting and cleaning caulk lines, can prevent future mold buildup, saving you time and effort down the road. Remember, addressing mold early keeps it from spreading and keeps your bathroom looking fresh and sanitized. Additionally, understanding the importance of proper ventilation considerations can help reduce moisture accumulation and prevent future mold growth.
Frequently Asked Questions
How Often Should I Replace Bathtub Caulk?
You should replace your bathtub caulk every 1 to 2 years for proper caulking maintenance. Regularly inspect it for cracks, mold, or deterioration, as these can lead to water damage and mold growth. Replacing caulk on schedule helps prevent mold buildup and keeps your bathroom hygienic. Always clean and dry the area before reapplying, and choose mold-resistant caulk to enhance mold prevention and prolong the lifespan of your sealant.
Can I Use Regular Household Cleaners to Remove Mold?
You can use household cleaners for mold removal, but they might not be enough for stubborn mold. Regular household cleaners like bleach or vinegar can help eliminate surface mold, but for deep-seated mold, you may need a specialized mold remover. Always wear gloves and guarantee good ventilation. For best results, use a cleaner specifically designed for mold removal to ensure all mold spores are effectively eliminated.
What Tools Are Best for Removing Old Caulk?
For caulk removal, you should use a utility knife or a caulk removal tool to cut through the old caulk easily. A putty knife or a plastic scraper works well to gently lift and remove stubborn sections. Choose tools with sharp blades for precise caulk removal, making the process smoother and more effective. Always wear gloves and work slowly to avoid damaging the surrounding surfaces during tool selection and caulk removal.
Is It Safe to Use Bleach on Bathroom Surfaces?
Using bleach on bathroom surfaces can be safe if you follow proper bleach safety guidelines. Always dilute bleach properly, wear gloves, and guarantee good ventilation during bathroom cleaning. Avoid using bleach on porous or colored surfaces that might stain or get damaged. Check manufacturer instructions first, and never mix bleach with other cleaners. When used correctly, bleach effectively disinfects and removes mold, making your bathroom safer and cleaner.
How Long Does It Take for New Caulk to Cure Completely?
It takes about 24 hours for new caulk to cure completely, but drying time can vary based on humidity and temperature. During caulk curing, you should avoid using the bathtub to ensure proper adhesion and prevent mold growth. Make sure to keep the area well-ventilated, allowing the caulk to dry thoroughly. Patience during this process guarantees a watertight, long-lasting seal on your bathtub.
Conclusion
Now that you’ve replaced the moldy caulk, your bathtub looks fresh and clean—like a breath of spring air. Keeping the area dry and well-ventilated helps prevent mold from sneaking back in. Regularly inspecting and resealing when needed guarantees your bathtub stays beautiful and mold-free. Think of your caulk as the skin of your tub; when it’s healthy and intact, your entire bathroom feels brighter and more inviting. Stay proactive, and enjoy your sparkling, fresh space!