To caulk like a pro, start by choosing the right caulk for your surface and environment, such as silicone for moisture-prone areas or acrylic for gaps around windows. Prepare the surface thoroughly by removing old caulk and cleaning dust and grease. Use proper tools like a caulk gun and apply steadily for a neat, even bead. Good surface prep guarantees better adhesion and a longer-lasting seal. Keep learning to perfect your technique and achieve professional results.
Key Takeaways
- Choose the correct caulk type based on the surface and environmental conditions for optimal adhesion and durability.
- Clean and remove old caulk thoroughly, then wipe the surface with a damp cloth to ensure a clean, dust-free area.
- Inspect the surface for damage or moisture issues and address underlying problems before applying new caulk.
- Use proper tools like a caulking gun and smooth with a finger or tool for a neat, professional finish.
- Maintain a steady hand and apply consistent pressure for even, clean sealing of gaps and cracks.

Caulking is a simple yet essential task that can improve your home’s energy efficiency and appearance. When you’re ready to get started, the first step is choosing the right caulk. Caulk selection is vital because different materials are suited for various surfaces and conditions. For example, silicone caulk works well in areas exposed to moisture, like bathrooms and kitchens, while acrylic latex is easier to work with and ideal for gaps around windows and trim. Before you begin applying new caulk, you should also gather the right cleaning tools to prepare the surface properly. Cleaning tools such as a putty knife, wire brush, or a utility scraper help remove old, peeling, or loose caulk, ensuring a clean surface that will bond well. Use a damp cloth or a mild cleaner to wipe away dust, dirt, or grease that might prevent the new caulk from adhering properly. Proper cleaning guarantees a longer-lasting seal and a neater finish. Additionally, understanding the importance of surface preparation can significantly impact the durability of your seal adhesion of caulk. This is especially true because surface conditions such as moisture or debris can hinder proper caulk adhesion, leading to early failure of the sealant. Being aware of surface preparation techniques can help you achieve a more durable and effective seal. For optimal results, consider proper surface inspection to identify any underlying issues that might compromise your seal over time.
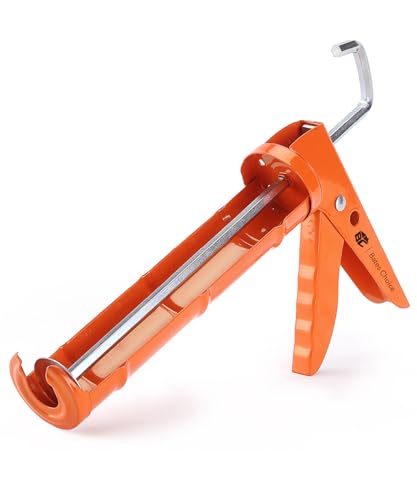
Bates- Caulking Gun, 10:1 Thrust Ratio, Orange, No Drip Sealant Gun
Introducing the Bates caulking gun, your versatile companion designed to seamlessly dispense a variety of materials – from…
As an affiliate, we earn on qualifying purchases.
As an affiliate, we earn on qualifying purchases.
Frequently Asked Questions
What Types of Caulk Are Best for Outdoor Use?
For outdoor use, you should choose caulk with excellent weather resistance and UV stability. These caulks withstand exposure to rain, sun, and temperature changes, preventing cracks and deterioration. Silicone or polyurethane caulk are top choices because they offer durability, flexibility, and long-lasting seals. Make sure to select a product labeled for exterior applications, so your gaps and cracks stay sealed and protected against harsh weather conditions.
How Do I Remove Old Caulk Effectively?
Removing old caulk is like peeling away a stubborn layer of paint. Start by using a utility knife or caulk remover tool to carefully cut along the edges. Then, grab a putty knife or scraper to gently lift and remove the remaining caulk. Use cleaning tools like a damp cloth to wipe away residue. Proper surface preparation guarantees a clean, smooth surface, making your new caulk adhere better and last longer.
Can I Paint Over the New Caulk?
Yes, you can paint over new caulk if you choose the right type. Make sure the caulk has fully cured, usually 24 hours, for proper caulk adhesion. Use a high-quality, paintable caulk designed for your surface, and select a paint compatible with it. Lightly sand the caulked area if needed, then apply your paint smoothly. This way, you get a seamless look without compromising the caulk’s effectiveness.
What Temperature Is Ideal for Applying Caulk?
The ideal temperature for applying caulk is between 40°F and 80°F, as this range provides ideal conditions for proper adhesion and curing. Avoid applying caulk in extreme temperatures, as cold weather can cause it to harden too quickly, while hot weather may make it too soft and difficult to work with. Always check the manufacturer’s recommendations for specific temperature considerations to guarantee the best results.
How Long Should Caulk Cure Before Painting?
Think of caulk as laying a foundation for your masterpiece. You should wait at least 24 hours for it to cure before painting, ensuring proper drying time and paint compatibility. Rushing this step might cause peeling or cracking, like a shaky bridge. Give it enough time, and your paint will glide smoothly, enhancing your home’s beauty and durability. Patience now means flawless results later.

GE Advanced Silicone Caulk for Kitchen & Bathroom, White, 2.8 fl oz Tube, 1 Pack – 100% Waterproof Silicone Sealant, 5X Stronger Adhesion, Shrink & Crack Proof
100% Silicone Caulk Protection: This silicone caulk white provides ultimate waterproof protection, ensuring a reliable seal against water…
As an affiliate, we earn on qualifying purchases.
As an affiliate, we earn on qualifying purchases.
Conclusion
Think you’ve got caulking down? Actually, some believe that using old, worn-out caulk can be just as effective as fresh sealant. But here’s the truth: fresh caulk creates a stronger, longer-lasting seal that saves you money on energy bills and prevents water damage. So, next time you seal a gap, use new caulk and follow these tips. It’s the only way to guarantee your home stays cozy, dry, and protected for years to come.

DAP Alex Plus Acrylic Latex Caulk, White, 10.1 Oz (7079818152)
Paintable caulk has strong multi-surface adhesion and won't shine through or discolor paint
As an affiliate, we earn on qualifying purchases.
As an affiliate, we earn on qualifying purchases.

ALLWAY CT31 3-in-1 Caulk Tool for Removal and Application
Multifunction 3-in-1 Caulk Tool: Comfortable soft-grip and made from strong engineering plastic
As an affiliate, we earn on qualifying purchases.
As an affiliate, we earn on qualifying purchases.