

Understanding home improvement terms helps you communicate better with contractors and tackle projects confidently. You’ll learn about essential components like downspouts, gutter guards, clapboards, fascia boards, and how they manage water runoff and protect your exterior. Knowing about double-glazed windows, moisture-resistant drywall, and tools like caulking guns improves your DIY skills. If you keep exploring, you’ll discover even more key terms to make your home projects smoother and more successful.
Key Takeaways
- Familiarize yourself with common terms like joists, load-bearing walls, and subfloor to understand structural components.
- Learn terminology related to exterior systems such as gutter guards, fascia, and clapboards for water management.
- Understand interior finish terms like baseboards, corner beads, and sealing to achieve polished results.
- Know essential tools and concepts like leveling, backfilling, and demolition for effective DIY projects.
- Recognize material options and their properties, including vinyl, fiber cement, and composite, to make informed choices.
Downspouts and Gutter Guards

Have you ever wondered how to keep your gutters clear and functioning properly? Downspouts are key—they direct rainwater from your gutters away from your home’s foundation, preventing water damage. Make sure your downspouts are free of blockages and positioned correctly to channel water far enough from your house. Gutter guards are a smart addition; they sit atop your gutters to block leaves, twigs, and debris from clogging the system. With gutter guards, you spend less time cleaning and reduce the risk of overflow during heavy rain. Regularly inspect your downspouts and guards to ensure they’re secure and free-flowing. Proper maintenance keeps water flowing smoothly and protects your home’s foundation, preventing costly repairs down the line. Utilizing energy-efficient home automation and security systems equipped with sensors can also help monitor and alert you to potential water issues early, ensuring your gutter system functions optimally. Additionally, understanding vetted maintenance practices can help you make informed decisions and avoid common pitfalls. Incorporating proper drainage planning can further enhance your system’s effectiveness and prevent flooding around your property.
Clapboards and Fascia Boards
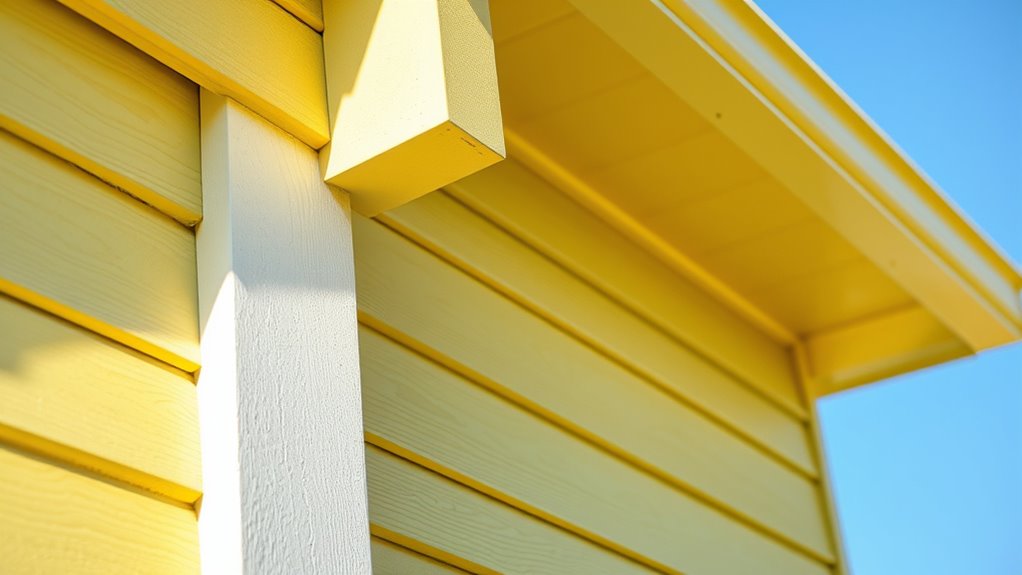
Clapboards serve as the exterior siding, protecting your home from weather and giving it a classic look. Installing fascia boards helps support your gutters and creates a clean roofline. You can choose from various materials like wood, vinyl, or fiber cement to match your style and budget. Proper installation and maintenance of these components are essential for ensuring the durability and safety of your home’s exterior building components. Regular inspection and cleaning can prevent issues like rot or damage, especially when ventilation considerations are properly addressed to reduce moisture buildup. Good ventilation practices can also extend the lifespan of your siding and fascia home maintenance.
Purpose of Clapboards
Clapboards serve as a vital component of your home’s exterior, protecting the structure from weather elements while giving it a classic, finished look. They act as a barrier against rain, wind, and sun, helping to prevent moisture from seeping into the walls and causing damage. Overlapping each board allows water to run off, reducing the risk of rot and mold. Additionally, clapboards add insulation, helping to keep your home warmer in winter and cooler in summer. Regular maintenance and proper installation techniques are essential to ensure their effectiveness and longevity. Their aesthetic appeal is also important, as they create a timeless, traditional appearance that can increase your home’s curb appeal. Properly installed clapboards not only safeguard your house but also enhance its overall style and value. Using high-quality clapboard materials can further improve durability and longevity. Incorporating visual and auditory cues during installation can ensure precise placement and alignment for optimal performance. Investing in professional assessment can help identify any underlying issues early, ensuring your exterior remains in top condition.
Installing Fascia Boards
Wondering how to give your home’s roofline a clean, finished look? Installing fascia boards is your answer. Here’s how to do it:
- Measure and cut the fascia board to match your roof’s length.
- Attach the board to the roof’s edge using corrosion-resistant nails or screws.
- Ensure the fascia is level by using a level tool before fastening.
- Seal any gaps with caulking to prevent water infiltration.
- Use appropriate DIY tools like a saw and drill to make the installation easier and more precise.
- Remember that proper weatherproofing techniques are essential to protect your fascia from the elements and prolong its lifespan.
Keep in mind, the fascia supports your gutters and completes the roofline. Proper alignment is key to a professional finish. Make sure the board is securely fastened, and check for any gaps or uneven spots. Ensuring proper home maintenance can also help extend the lifespan of your fascia and gutter system. Additionally, selecting the right materials for your fascia can improve durability and appearance. Choosing high-quality building materials can also help prevent issues related to weather exposure. With these steps, you’ll achieve a neat, durable fascia that enhances your home’s appearance.
Material Choices for Clapboards
Choosing the right material for your clapboards and fascia boards is essential for both durability and curb appeal. You have several options, each with pros and cons. Traditional wood offers authenticity and easy customization but requires regular maintenance to prevent rot and pests. Vinyl siding is low-maintenance, affordable, and resistant to weather, making it a popular choice. Fiber cement combines the look of wood with durability and resistance to fire, pests, and moisture. Composite materials, made from recycled plastics and wood fibers, provide a sustainable option with long-lasting performance. Consider your climate, maintenance preferences, and budget when selecting materials. Properly selected materials will ensure your home’s exterior remains attractive, protected, and structurally sound for years to come. Additionally, understanding material durability can help you choose options that stand up to your specific environmental conditions, especially since some electric dirt bikes can reach high speeds and require sturdy, resilient exterior components. Choosing materials with high resistance to weathering is particularly important in areas prone to harsh weather or extreme temperature fluctuations.
Aggregate in Concrete Mixes

Have you ever wondered what gives concrete its strength and durability? It’s the aggregate you add to the mix. This material, like sand, gravel, or crushed rock, plays a key role in reinforcing the concrete. Here’s what you need to know:
Understanding aggregate is key to creating strong, durable concrete for your projects.
- Type Matters: Choose the right aggregate based on your project—different sizes and materials impact strength and workability.
- Size Counts: Smaller aggregates fill gaps better, creating a dense, solid mix, while larger ones add structural support.
- Clean and Dry: Always use clean, dry aggregate to prevent impurities that weaken the concrete.
- Proportioning: The right ratio of aggregate to cement ensures *ideal* strength and durability, so measure carefully.
Understanding aggregate helps you create stronger, longer-lasting concrete for your home projects.
Double-Glazed Windows for Better Insulation

Installing double-glazed windows can considerably boost your home’s thermal efficiency, helping keep your space warmer in winter and cooler in summer. You’ll also notice less noise from outside, creating a quieter, more peaceful environment. Plus, upgrading to these windows can lead to noticeable energy cost savings over time.
Enhanced Thermal Efficiency
Double-glazed windows enhance thermal efficiency by trapping air or gas between two panes of glass, creating an insulating barrier that reduces heat transfer. This design keeps your home warmer in winter and cooler in summer. To maximize benefits, consider these factors:
- Choose windows with low-emissivity (Low-E) coatings that reflect heat back into your home.
- Ensure proper sealing around the frame to prevent drafts and leaks.
- Opt for argon or krypton gas fills between panes for better insulation.
- Regularly maintain and inspect for any cracks or damages that could compromise the barrier.
Noise Reduction Benefits
Double-glazed windows not only improve your home’s thermal efficiency but also considerably reduce noise from outside. The two glass panes, separated by a gap, act as a buffer, dampening sound vibrations before they enter your living space. This design minimizes noise pollution from busy streets, traffic, or neighbors, creating a quieter, more comfortable environment. You’ll notice less disturbance during sleep, work, or relaxation, even if your home is near noisy areas. The extra layer of glass also absorbs and deflects sound waves, making your home more peaceful. Installing double-glazed windows is a smart upgrade that enhances your comfort, helping you enjoy a quieter, more serene indoor atmosphere without sacrificing natural light or ventilation.
Energy Cost Savings
Are you looking for an effective way to lower your energy bills? Double-glazed windows can boost insulation and cut costs considerably. Here’s how they help:
- They trap air between two glass panes, creating a barrier that reduces heat transfer.
- The space between panes can be filled with argon or krypton gas, enhancing insulation.
- They minimize drafts, preventing cold spots in winter and heat gain in summer.
- Improved insulation means your heating and cooling systems don’t work as hard, saving energy and money.
Installing double-glazed windows not only boosts comfort but also reduces your energy consumption. Over time, the savings on your utility bills easily justify the initial investment, making them a smart upgrade for any home.
Understanding Sashes and Backing in Windows

Have you ever wondered how windows open or how they stay secure? That’s where sashes and backing come in. The sash is the movable frame holding the glass pane, allowing you to open, close, and ventilate your window. Sashes can slide vertically or tilt inward, depending on the style. Backing refers to the framing added between the studs behind drywall, providing support for fixtures or hardware attached to the wall, like curtain rods or towel bars. Properly functioning sashes ensure smooth operation and security, while backing reinforces wall strength around openings. Understanding these components helps you maintain or replace windows effectively, ensuring your home remains energy-efficient, secure, and easy to operate.
The Role of Baseboards and Corner Beads
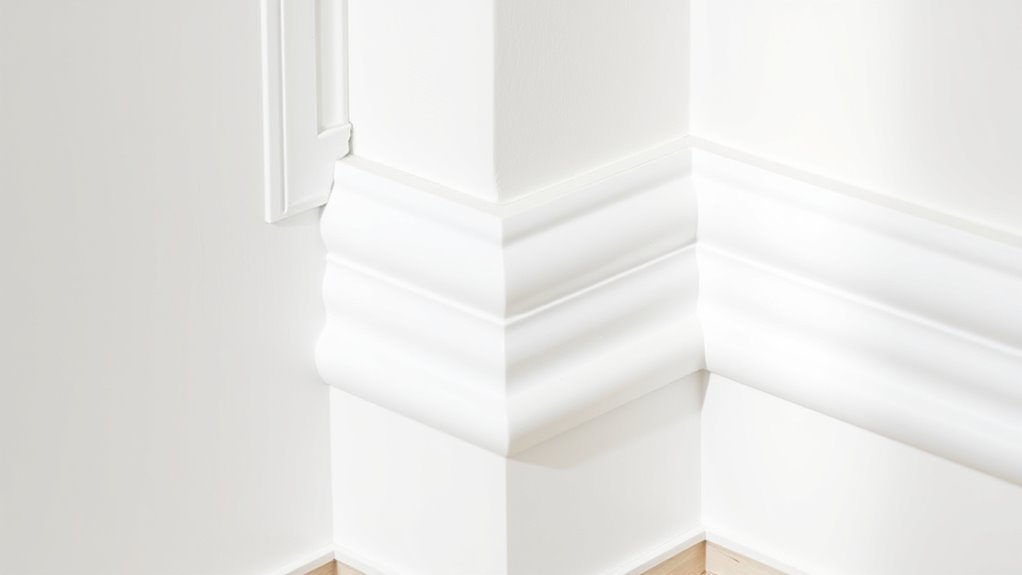
Baseboards and corner beads are essential for finishing your walls and protecting their edges. They give your space a polished look and prevent damage from everyday wear. Understanding their roles helps you achieve a professional finish in your DIY projects.
Finishing Touch Details
Ever wonder how a room’s clean, polished look is achieved? Finishing touch details like baseboards and corner beads play a key role. They hide gaps and connections, giving your space a seamless appearance. Here’s what they do:
- Protect edges — Corner beads guard drywall corners from damage and chipping.
- Create clean lines — Baseboards cover gaps between floors and walls, providing a sleek finish.
- Add style — Different profiles and widths give your room character and visual appeal.
- Enhance durability — These elements prevent wear and tear, prolonging your surfaces’ lifespan.
Protecting Wall Corners
| Protection Type | Material | Purpose |
|---|---|---|
| Corner Bead | Metal or plastic | Reinforces drywall corners |
| Baseboard | Wood or MDF | Covers gaps, adds aesthetic |
| Sealant | Caulk | Fills gaps, prevents water damage |
| Trim | Various | Enhances room’s appearance |
Subfloors and Laminate Flooring
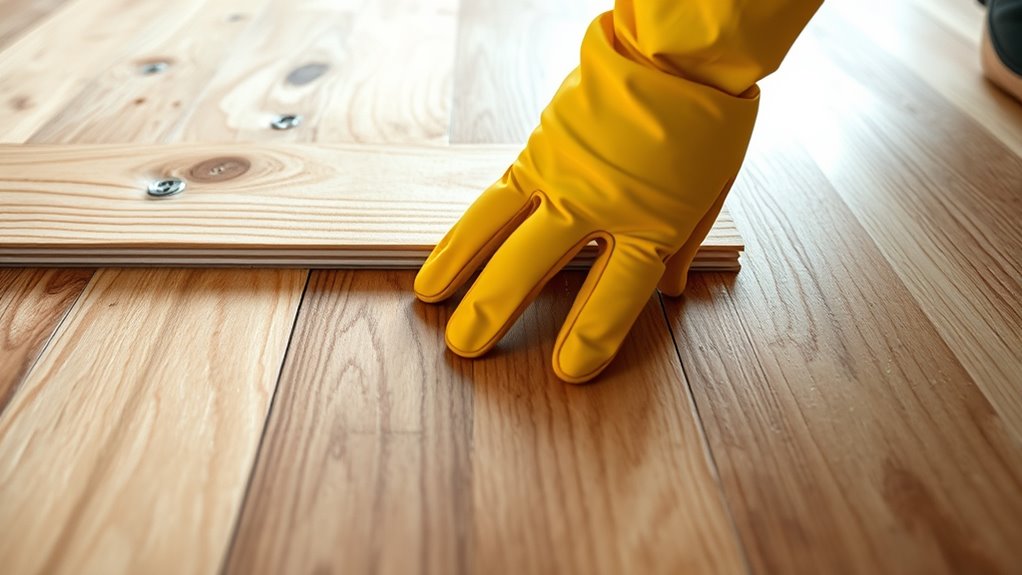
Are you wondering how to guarantee your laminate flooring stays level and durable? First, verify your subfloor is clean, dry, and free of debris. This foundation affects the entire installation. Next, follow these steps:
Ensure a level, clean subfloor to keep your laminate flooring durable and well-installed.
- Check for levelness using a level tool, adjusting high or low spots.
- Install an underlayment to provide insulation, moisture barrier, and cushion.
- Lay the laminate planks tightly together, clicking them into place without gaps.
- Secure the edges with finishing strips or molding to prevent movement.
Hardwood and Ceramic Tile Choices
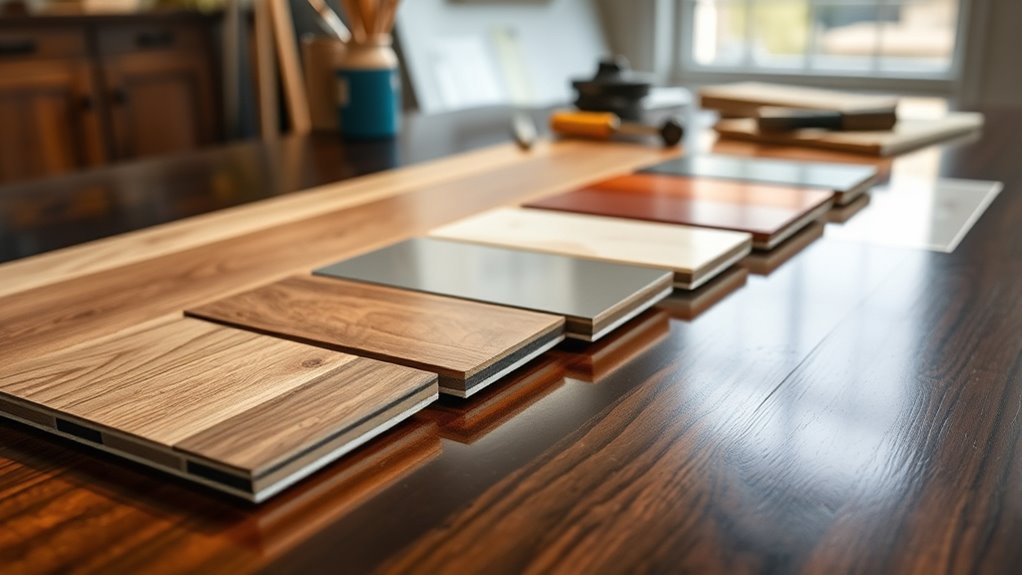
Choosing between hardwood and ceramic tile depends on your specific needs and style preferences. Hardwood offers warmth, elegance, and a timeless look, perfect for living rooms and bedrooms. It’s durable but can scratch or dent over time, especially in high-traffic areas. Ceramic tile, on the other hand, is resistant to moisture, ideal for kitchens, bathrooms, and entryways. It’s easy to clean and highly durable, but can feel colder and harder underfoot. Consider your environment and how much foot traffic the space gets. Hardwood requires regular maintenance like refinishing, while ceramic tile is low-maintenance but may chip if heavy objects are dropped. Your choice should balance aesthetics, function, and longevity to suit your lifestyle and design goals.
Reading Blueprints for Your Home Project

Understanding blueprint symbols helps you recognize what’s planned for your home project without clarity. Interpreting floor plans shows how spaces connect and what each room will look like. Mastering these basics ensures you stay on top of your construction or remodeling efforts.
Understanding Blueprint Symbols
Blueprint symbols serve as a universal language that communicates essential information about your home project. They quickly convey details without lengthy descriptions, helping you understand the design at a glance.
Here’s what to look for:
- Walls: Solid lines show walls; dashed lines indicate hidden or overhead features.
- Doors: Arcs represent door swings, showing direction and space needed.
- Windows: Thin rectangles or lines indicate window placement, with symbols for double-glazed or casement types.
- Electrical fixtures: Symbols like circles or squares mark outlets, switches, and lighting points.
Familiarizing yourself with these symbols lets you read plans confidently, ensuring your project stays on track and matches your vision.
Interpreting Floor Plans
Have you ever looked at a floor plan and felt unsure about what all the symbols and lines mean? Don’t worry—reading blueprints gets easier with practice. Start by understanding that solid lines outline walls, while dashed lines show elements above or below the plane, like overhead cabinets or beams. Doors are indicated by arcs showing their swing direction, and windows are represented by thin rectangles within walls. Rooms are labeled with dimensions, helping you visualize space. Look for symbols that mark electrical outlets, switches, and plumbing fixtures. Keep in mind, scale is essential—most plans include a scale bar or ratio, so measure carefully to interpret actual sizes. With patience, you’ll quickly become confident in reading floor plans and planning your home projects effectively.
Load-Bearing Walls and Structural Support
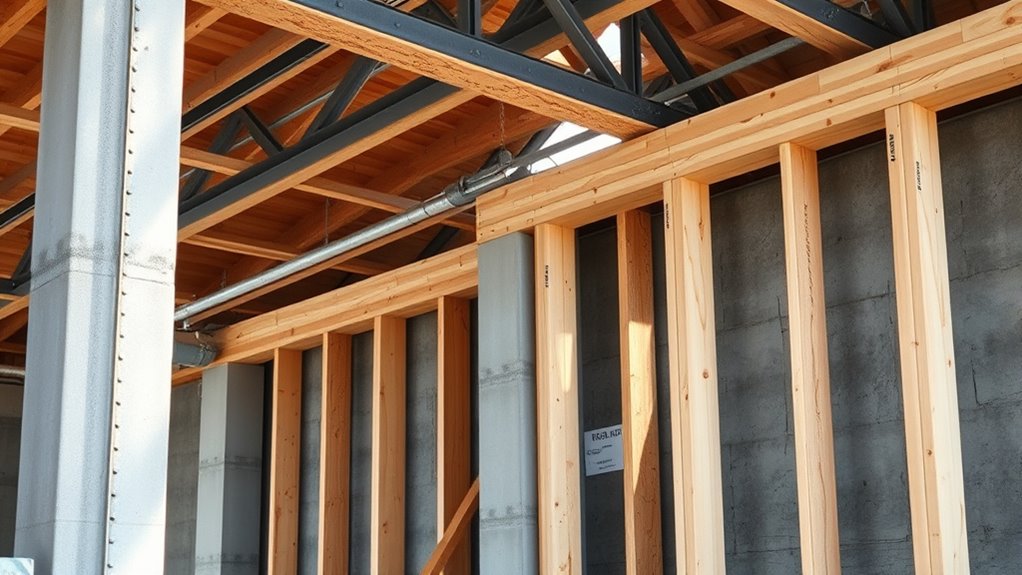
Load-bearing walls are essential structural elements that support the weight of the floors, roof, and upper walls above. You need to identify them before making any modifications. Here’s how:
- Check the Blueprints: Look for walls marked as load-bearing or thicker walls on the plans.
- Look for Support Beams: Walls directly above beams or columns are often load-bearing.
- Examine the Wall’s Position: Exterior walls and those aligned with foundation walls usually support weight.
- Consult a Professional: When in doubt, get a structural engineer’s opinion to avoid compromising your home’s integrity.
Removing or altering a load-bearing wall without proper reinforcement can cause structural issues. Always verify before making changes to ensure safety and stability.
Support Beams: Joists and Their Importance
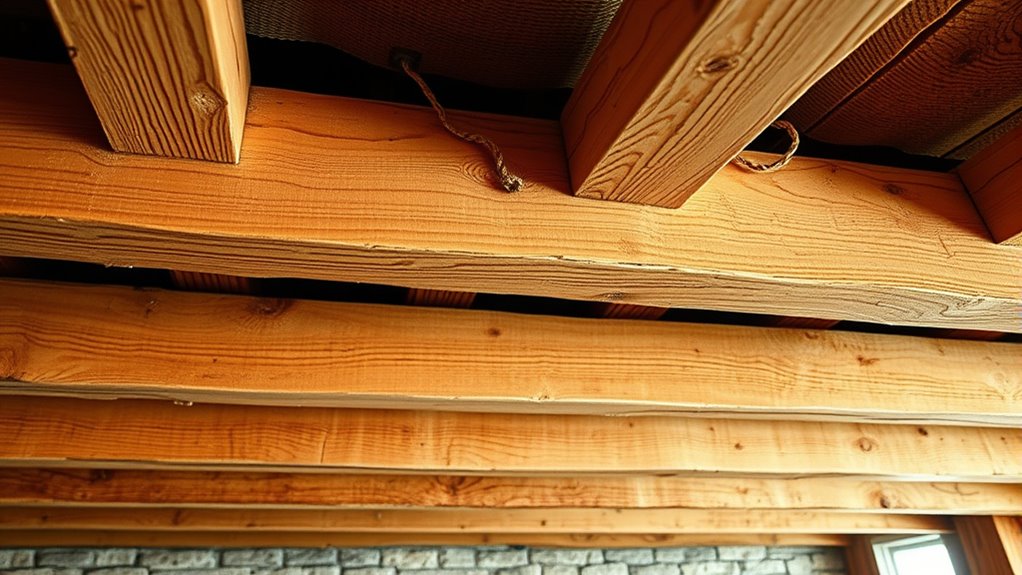
Your support beams, or joists, are essential for holding up floors and ceilings, providing critical stability. If you notice sagging, creaking, or uneven surfaces, it could be a sign of joist damage. Addressing these issues promptly helps prevent costly structural problems down the line.
Role in Structural Support
Ever wondered how a building stays sturdy and level? Support beams, especially joists, play a vital role in this. They distribute weight across the structure, preventing sagging or collapse. Here’s how they work:
- Load Distribution: Joists transfer the weight of floors and ceilings to load-bearing walls or beams.
- Structural Integrity: They maintain the shape and stability of your home’s framework.
- Support for Flooring: Joists provide a solid base for subflooring and finished floors.
- Resistance: Properly installed joists resist shifting, ensuring safety and durability.
Without strong joists, your home would lack stability, risking damage over time. Understanding their role helps you appreciate how essential these horizontal supports are in maintaining your home’s strength and safety.
Signs of Joist Damage
Recognizing signs of joist damage early can prevent serious structural issues. Look for sagging floors or ceilings, which indicate weakened support. Cracks in drywall or plaster beneath the joists can signal movement or stress. Notice any creaking noises when walking across a surface—these sounds often point to compromised joists. Visible mold, rot, or termite damage on exposed wood is a clear warning sign, especially in areas prone to moisture. Warped or cracked wood beams suggest structural weakness. Also, if you see gaps or unevenness in your flooring, it’s time to inspect the joists. Addressing these signs promptly helps prevent costly repairs and keeps your home safe. Regular inspections are key, especially in older houses or after heavy weather events.
Backfilling During Construction

Backfilling is a crucial step in construction that involves refilling trenches or holes created during excavation. Proper backfilling guarantees stability and prevents future settling issues. When backfilling, you should:
- Compact the soil or material in layers to increase stability and reduce air pockets.
- Use suitable materials like gravel or soil, depending on the project’s needs.
- Avoid overfilling or leaving large voids by carefully monitoring levels.
- Check for proper drainage to prevent water buildup that could weaken the foundation.
Demolition: Clearing the Way for Renovation

Have you ever wondered what it takes to prepare a space for a fresh start? Demolition is the first step in many renovation projects, involving the careful removal of existing structures and finishes. Your goal is to clear out walls, fixtures, and flooring, making way for new designs. Start by evaluating what needs to come down, ensuring you don’t damage surrounding areas or load-bearing structures. Use the right tools, like sledgehammers, crowbars, and power saws, to make the process efficient. Protect yourself with safety gear, including gloves, goggles, and masks. Keep debris contained with tarps or dumpsters, and check local regulations for disposal rules. Proper demolition sets the foundation for a smooth renovation, ensuring your new space is built on a clean, stable surface.
Installing Backsplashes and Waterproof Walls
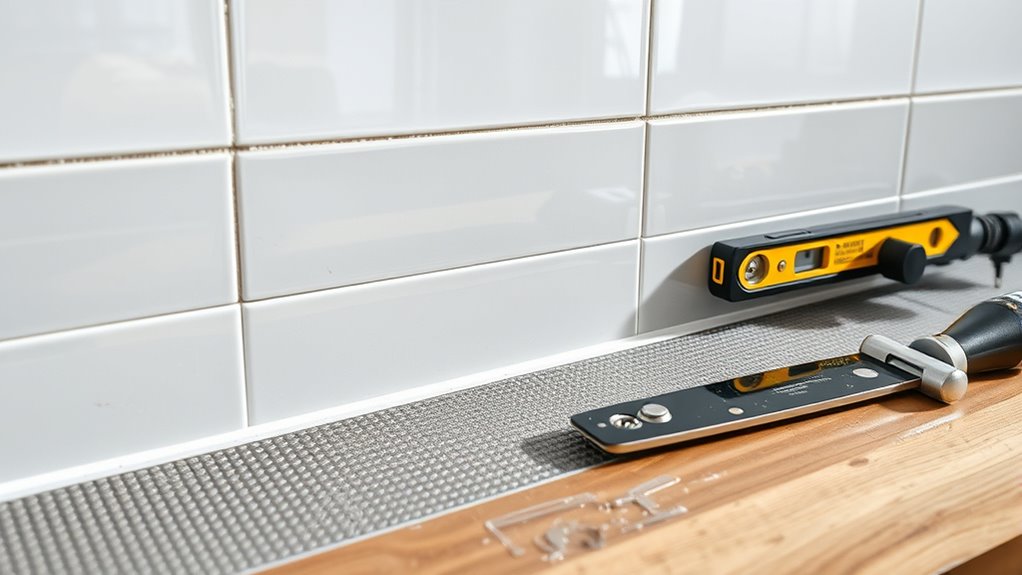
After clearing out the old fixtures and finishes, it’s time to focus on protecting your walls from water damage. Start by choosing a waterproof material, like ceramic tile or a specialized paint. Then, follow these steps:
- Prepare the surface by cleaning and applying a primer suited for moisture-prone areas.
- Install a waterproof backing, such as cement board, behind the tile or paint to prevent water seepage.
- Apply a high-quality sealant or grout between tiles to ensure no water can penetrate.
- Finish with a waterproof topcoat or protective layer to guard against splashes and humidity.
This process creates a durable, water-resistant barrier that keeps your walls safe and looking great. Proper installation guarantees longevity and minimizes future repairs.
Fungicides to Prevent Mold and Dry Rot
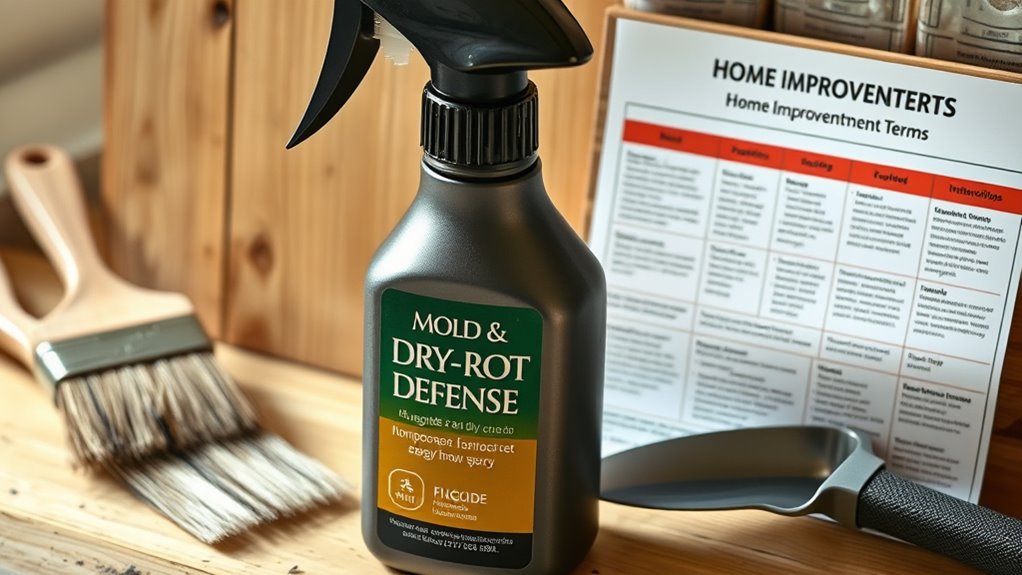
Are you aware of how mold and dry rot can threaten your home’s structural integrity? These issues often develop in damp, dark areas and can weaken wood and drywall over time. To prevent this, you should consider using fungicides—special chemicals designed to kill fungus and inhibit future growth. Apply fungicides to vulnerable surfaces like wooden beams, framing, or areas prone to moisture buildup. Make sure to follow the manufacturer’s instructions for proper coverage and safety precautions. Regularly inspecting and treating these areas helps keep mold and dry rot at bay, saving you costly repairs down the line. Remember, early prevention is key to maintaining a strong, safe home environment. Using fungicides effectively protects your investment and extends the life of your home’s structural components.
Cabinet Refacing for Kitchen Updates
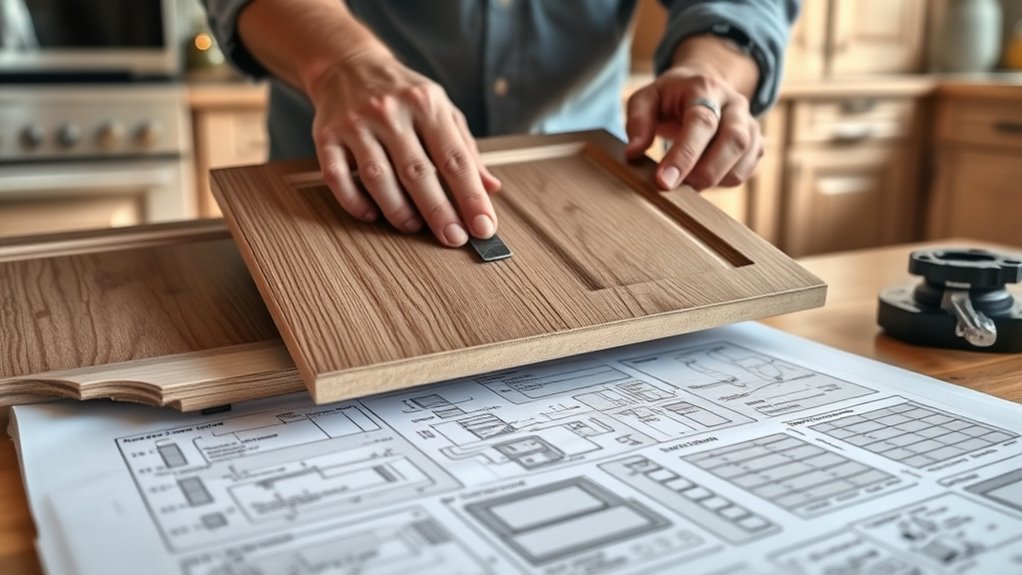
If you’re looking to update your kitchen without the expense and hassle of replacing cabinets, cabinet refacing offers an efficient solution. It involves updating the cabinet doors, drawer fronts, and hardware while keeping the existing frame. Here’s how it works:
- Remove old doors and hardware to prepare the surface.
- Sand and clean the cabinet boxes for a smooth finish.
- Apply veneer or paint to give a fresh look.
- Replace hardware like knobs and handles for a modern touch.
Refacing is faster and less disruptive than full replacement, saving you time and money. It also allows you to customize the style and finish to match your aesthetic. This approach offers a cost-effective way to transform your kitchen’s appearance effortlessly.
Material Allowances in Home Renovation Budgets

Material allowances play a key role in planning your home renovation budget, especially when updating areas like your kitchen cabinets or flooring. These allowances set aside a specific amount for materials you haven’t selected yet, helping you avoid surprises later. By allocating funds for items like tiles, countertops, or paint, you ensure your project stays on track financially. Here’s a quick look at typical material allowances:
| Material Type | Estimated Cost | Notes |
|---|---|---|
| Flooring | $2,000 | Includes underlayment |
| Kitchen Cabinets | $3,500 | Custom or stock options |
| Countertops | $2,000 | Quartz, granite, or laminate |
| Paint & Finishes | $600 | Multiple rooms |
| Fixtures & Hardware | $800 | Handles, knobs, faucets |
Adjust allowances based on your preferences and scope to keep your budget realistic.
Moisture-Resistant Drywall: Green Board
Looking for a drywall that can withstand moisture and prevent mold growth? Green board, or moisture-resistant drywall, is your answer. It’s specially designed with a water-resistant core and a treated paper surface, making it ideal for humid areas. Here’s what you should know:
- It’s commonly used in bathrooms, kitchens, and laundry rooms.
- The core resists humidity and minimizes mold development.
- It’s easy to cut and install, just like regular drywall.
- For extra protection, seal joints with waterproof tape and compound.
While green board isn’t entirely waterproof, it provides better moisture resistance than standard drywall. Use it where moisture exposure is frequent but not continuous, ensuring your walls stay mold-free longer.
Essential Tools: Screwdrivers, Drills, and Level

Essential tools like screwdrivers, drills, and levels are fundamental for any DIY project or professional renovation. A screwdriver allows you to fasten or remove screws easily, whether you’re assembling furniture or installing fixtures. Choose between flat-head and Phillips-head types based on your screws. A drill speeds up tasks like drilling holes or driving screws into tougher materials; cordless models offer portability. A level ensures your surfaces are perfectly horizontal or vertical, preventing crooked installations. Using a level when hanging shelves or installing cabinets guarantees everything lines up correctly. These tools form the backbone of most home improvement tasks, making projects safer, more accurate, and efficient. Investing in quality tools will save you time and effort while helping you achieve professional-looking results.
Caulking Guns and Sealant Applications

Have you ever struggled to achieve a clean, waterproof seal on gaps or joints in your home? Using a caulking gun makes this task easier and more precise. Here’s how you can make the most of it:
- Load the sealant tube into the gun, ensuring it’s secure.
- Cut the nozzle at a 45-degree angle for controlled application.
- Apply steady pressure on the trigger, moving smoothly along the gap.
- Smooth the sealant with a finger or tool for a professional finish.
Choose the right sealant for your project—silicone for waterproofing, acrylic for general repairs. Practice makes perfect, so take your time for neat, durable results. Proper application keeps your home protected from water damage and drafts.
Frequently Asked Questions
How Do I Identify Load-Bearing Walls in My Home?
You can identify load-bearing walls by checking your blueprints first; they show which walls support the structure. Look for walls directly above or below other load-bearing elements, like beams or joists. Usually, exterior walls are load-bearing, and interior walls running perpendicular to joists are likely to be too. If unsure, consult a structural engineer or a professional before making any removal or modification to avoid compromising your home’s stability.
What Are the Best Materials for Waterproofing a Backsplash?
Think of your backsplash as a fortress guarding your walls—choose the right material to keep it safe. Ceramic tile is your best bet because it’s waterproof, durable, and easy to clean. Glass tiles offer a sleek look and resist stains, while vinyl sheets are budget-friendly and simple to install. Whichever you pick, make certain it’s sealed properly to prevent water from seeping behind, protecting your space for years to come.
How Can I Tell if a Window Is Double-Glazed?
To tell if a window is double-glazed, look for a small gap between the two panes of glass; you might see a faint line or a slight reflection difference. Tap lightly on the glass—double-glazed windows sound more solid and duller than single-pane ones. Alternatively, check the edges of the window frame for a spacer or a label indicating double glazing. If unsure, ask a professional for confirmation.
What Tools Are Essential for Installing New Gutters?
You need the right tools to install gutters, balancing strength and precision. Grab a sturdy ladder to reach your roofline safely, a tape measure for accurate length, and a level to ensure proper alignment. Use a hacksaw or tin snips to cut gutter sections, a drill for securing brackets, and a screwdriver for tight fittings. Don’t forget sealant and screws to keep everything waterproof and secure, preventing future leaks and damage.
How Do I Choose the Right Type of Flooring for My Space?
To select the right flooring for your space, consider its function, style, and durability. If you want something that lasts and looks natural, hardwood might be best. For affordability and easy maintenance, laminate is a good choice. Ceramic tile works well in moisture-prone areas like bathrooms and kitchens. Think about your budget, the level of foot traffic, and the aesthetic you desire to guarantee your flooring choice suits your needs perfectly.
Conclusion
Don’t let confusing jargon hold you back from tackling your home projects. With a little know-how, you’ll navigate terms like downspouts or moisture-resistant drywall with confidence. Even if you’re worried about complexity, remember that every expert started somewhere. So grab your tools, stay curious, and turn those home improvement dreams into reality—you’ve got this!