
When it’s time to upgrade your old toilet, start by turning off the water supply and draining the tank and bowl. Disconnect the water line, remove the bolts holding the toilet, and carefully lift it away. Check and clean the flange before installing the new wax ring and positioning the new toilet. Secure it in place, reconnect the water, and test for leaks. Keep going, and you’ll discover all the steps to do it smoothly yourself.
Key Takeaways
- Turn off the water supply, drain the toilet, and remove it carefully, preferably with assistance.
- Inspect and replace the flange if damaged, then clean the area thoroughly.
- Position the new toilet, align the bolts, and securely tighten to the floor.
- Reconnect the water supply line, turn on water, and check for leaks.
- Test flush the new toilet to ensure proper operation and that no leaks occur around the base.
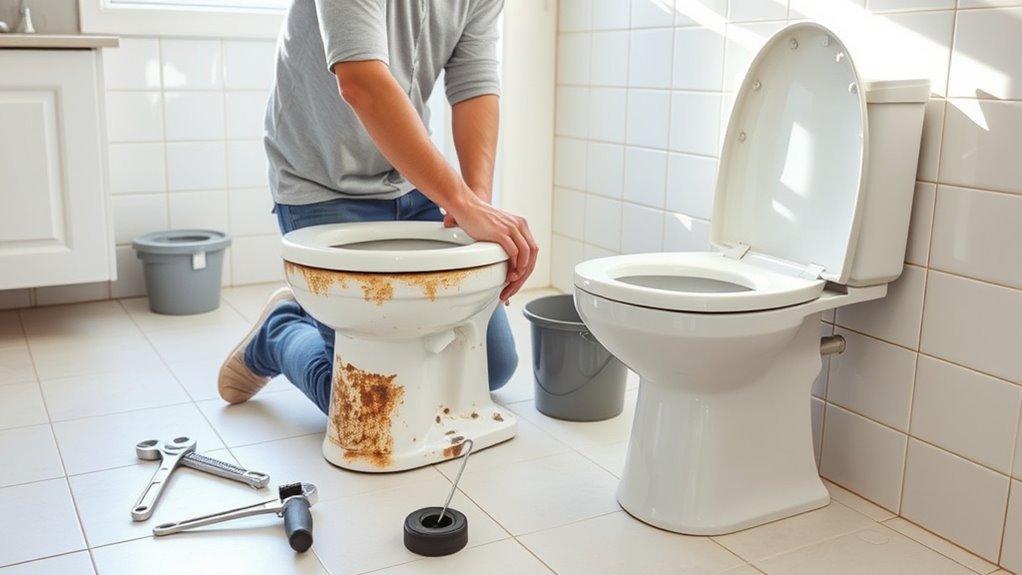
Replacing an old toilet can seem intimidating, but with the right tools and steps, it’s a manageable DIY project. The first step is to gather your plumbing tools, including a wrench, adjustable pliers, a putty knife, and a sponge. Having these ready guarantees a smoother process. As you start, turn off the water supply to prevent any leaks or spills, and flush the toilet to empty the tank and bowl. Use the sponge to soak up remaining water in the bowl and tank, keeping your workspace clean and dry.
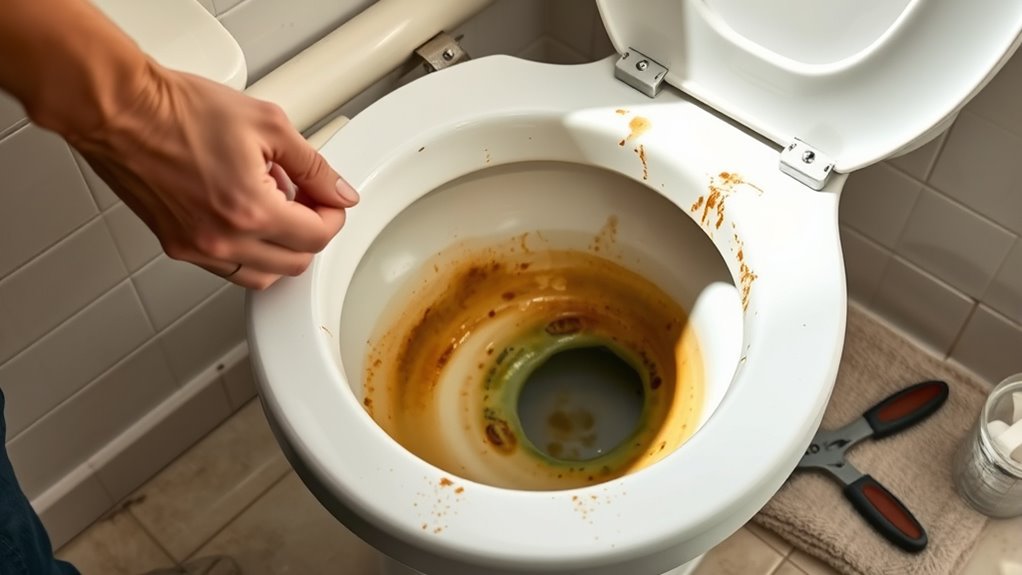
Next, disconnect the water supply line from the tank using your plumbing tools. Carefully loosen the nut holding the connection, and be prepared for a small splash of water. Once disconnected, remove the old toilet by unscrewing the bolts at the base. You might need to cut through any old wax ring residue with your putty knife to free the toilet from the floor. Be cautious, as old toilets can be heavy and awkward to handle; it’s wise to have a friend help steady it.
When removing the old toilet, check the flange and drain for any damage or buildup. If the flange looks worn or broken, it’s a good idea to replace or repair it before installing the new toilet. Now, it’s time to prepare the space for the new fixture. Clean the flange area thoroughly and lay down a new wax ring, ensuring it’s centered properly. This ensures a good seal and prevents leaks. If water conservation is a priority, consider choosing a high-efficiency, low-flush toilet that uses less water per flush, saving you money and helping the environment.
Position the new toilet carefully over the flange, aligning the bolts to secure it firmly to the floor. Tighten the bolts evenly to avoid cracking the porcelain. Next, reconnect the water supply line and turn the water back on, checking for leaks. Flush the new toilet a few times to confirm everything is working correctly and that no water is escaping around the base or supply line.
With your new toilet installed, you’ve not only freshened up your bathroom but also improved water efficiency. Replacing an old toilet is a straightforward project when you use the right tools and follow these steps. It’s a practical way to upgrade your home, reduce water bills, and contribute to water conservation efforts. Just take your time, double-check your work, and enjoy the satisfaction of completing a DIY project that benefits both your home and the environment. Additionally, understanding nanotechnology can inspire innovative solutions to water conservation challenges and other household improvements.
Frequently Asked Questions
How Do I Choose the Right Toilet Size for My Bathroom?
You should measure your bathroom space to choose the right toilet size, ensuring it fits comfortably without crowding. Consider the bathroom aesthetics by selecting a style and height that complement your decor. Water efficiency is also vital; opt for a dual-flush or low-flow model to save water and reduce bills. By balancing these factors, you’ll find a toilet that fits well, looks great, and helps conserve water.
What Tools Are Essential for Toilet Replacement?
Think of replacing your toilet as assembling a puzzle; you need the right tools to see it through. Essential tools include a wrench for plumbing basics, a screwdriver, a putty knife, and a bucket. Don’t forget pliers and a level for proper installation. Understanding toilet flushing mechanisms helps guarantee you select the right replacement. With these tools, you’re prepared to swap your old toilet and restore your bathroom’s flow smoothly.
How Do I Prevent Leaks After Installation?
To prevent leaks after installation, you should carefully apply a high-quality sealant around the base of the toilet and the bolt holes. Make sure the wax ring is properly positioned and compressed evenly when setting the toilet. Tighten the bolts gradually, avoiding over-tightening that could crack the porcelain. Regularly check for leaks and reseal if you notice any moisture, ensuring a secure, leak-free fit.
Can I Replace a Toilet Without Professional Help?
Ever thought, can I handle DIY plumbing on my own? Absolutely! Replacing a toilet without professional help is doable if you follow proper steps. You’ll need basic tools, patience, and a little know-how about toilet maintenance. Before starting, shut off the water supply and disconnect the old unit carefully. With some research and caution, you can confidently upgrade your bathroom, saving money while gaining a satisfying DIY plumbing achievement.
What Is the Average Cost of Replacing a Toilet?
The average cost to replace a toilet ranges from $200 to $500, including installation. You’ll save money by doing it yourself and can choose a water-efficient model to conserve water and make cleaning easier. Keep in mind, investing in a good toilet can reduce cleaning time and improve water conservation. Budget wisely, and consider the long-term savings from lower water bills when selecting your new toilet.
Conclusion
Now that you’ve replaced your old toilet, you’ve basically become a plumbing superhero—conquering a project that’s as tough as climbing Mount Everest! Remember, a fresh toilet not only boosts your bathroom’s look but also saves water and prevents leaks. So, give yourself a high-five for tackling this DIY challenge head-on. With your newfound skills, no bathroom obstacle can stand in your way. Your bathroom’s now as modern as a spaceship—ready for whatever comes next!