
To install a bathroom exhaust fan, first turn off the power and remove the existing cover. Then, mark where the fan will go, cut the hole, and secure the mounting bracket. Connect the wiring—black to black, white to white, and ground—then attach the fan to the bracket. Vent the duct outside and seal all connections. If you follow these steps carefully, you’ll set up a quieter, more efficient fan that improves bathroom airflow—and there’s more to explore for a smooth installation.
Key Takeaways
- Turn off power at the circuit breaker before beginning installation.
- Remove the existing fixture or cover plate and check wiring for safety.
- Mount the fan’s bracket securely to the ceiling at an optimal location.
- Connect wiring correctly: black to black, white to white, and ground wire to ground.
- Seal ductwork venting outside with foil tape and test the fan for proper operation.
Installing a bathroom exhaust fan is a practical way to improve ventilation and reduce moisture buildup. Proper ventilation benefits not only prevent mold and mildew growth but also help eliminate unpleasant odors and keep the air fresh. When choosing a fan, consider its ventilation benefits—look for models with sufficient airflow capacity for your bathroom size. A fan that’s too weak won’t effectively clear humidity, while an overly powerful one might be unnecessary and louder than needed. Pay attention to fan noise levels as well; quieter models make the space more comfortable, especially if your bathroom is near bedrooms or shared living areas. Modern fans often feature noise-reduction technology, so pick one that strikes a balance between effective ventilation and minimal noise.
Choose a quiet, powerful fan with appropriate airflow for effective bathroom ventilation.
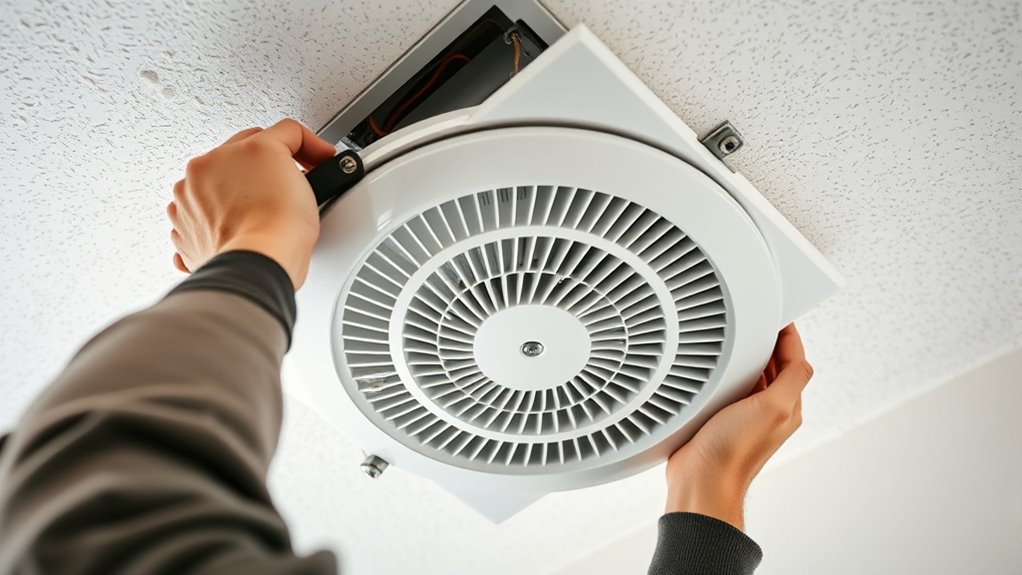
Before installing, turn off the power at the circuit breaker. Remove the existing fixture or cover plate, and check the wiring. If you’re replacing an old fan, disconnect it and inspect the wiring for safety and compatibility. Most fans connect via standard electrical connections, but if you’re unfamiliar with wiring, consider consulting a professional. Next, locate the ideal spot for the fan, typically on the ceiling near the shower or bathtub, where it can effectively remove moisture. Mark the mounting points and cut a hole if needed, ensuring it lines up with the fan’s duct opening. Proper placement is key to maximizing ventilation benefits and ensuring the fan operates efficiently. Additionally, understanding ventilation capacity helps in selecting the right size fan for your bathroom.
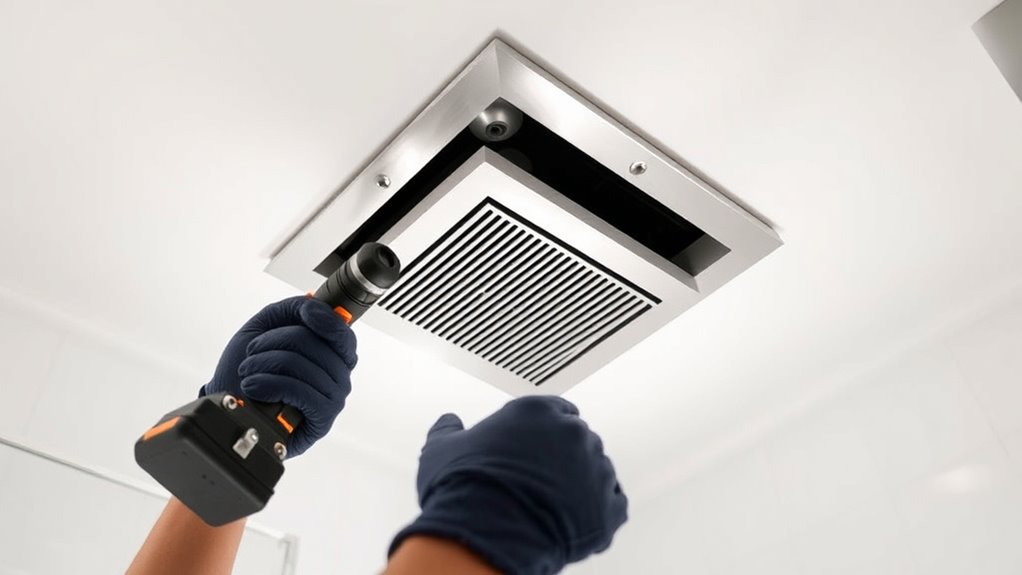
Attach the fan’s mounting bracket to the ceiling, following the manufacturer’s instructions. Connect the wiring—usually black to black (hot), white to white (neutral), and green or copper for ground—using wire nuts. Secure the fan to its mounting bracket, making sure it’s stable and flush against the ceiling. Connect the ductwork, which should vent outside to prevent moisture from lingering inside your walls or attic. Seal all connections with foil tape to prevent leaks. Once everything’s secured and connected, turn the power back on and test the fan. Check its operation, listen for noise levels, and ensure it runs smoothly without excessive noise or vibrations.
Finally, replace any covers or grilles, and clean up your workspace. With a correctly installed exhaust fan, you’ll notice improved airflow, reduced humidity, and a more comfortable bathroom environment. Regular maintenance, like cleaning the grille and inspecting the ductwork, will keep your ventilation benefits maximized and ensure the fan continues to operate quietly. Taking these steps not only enhances your bathroom’s air quality but also prolongs the lifespan of your new exhaust fan, making the investment well worth it.

Broan-Nutone® Bathroom Exhaust Fan, 50 CFM Modern Grille, Energy Star Fan, 2.0 Sones
50 CFM BATHROOM EXHAUST FAN: 50 CFM is sufficient ventilation to remove, moisture, odor and pollutants from your…
As an affiliate, we earn on qualifying purchases.
As an affiliate, we earn on qualifying purchases.
Frequently Asked Questions
Can I Install an Exhaust Fan Myself Without Professional Help?
Yes, you can do a DIY installation of a bathroom exhaust fan if you’re comfortable with basic electrical work and follow safety precautions. Make sure to turn off power before starting, use proper tools, and read the manufacturer’s instructions carefully. If you’re unsure about wiring or venting, it’s best to consult a professional. Taking these safety precautions guarantees your installation is safe and effective.
What Is the Ideal Size for a Bathroom Exhaust Fan?
The ideal size for your bathroom exhaust fan depends on your space’s ventilation requirements and fan capacity. Generally, aim for 1 CFM (cubic feet per minute) per square foot of bathroom area. For example, a 50-square-foot bathroom needs a fan with at least 50 CFM. Choosing the right size guarantees effective ventilation, reduces humidity, and prevents mold growth. Always check your bathroom’s specifications for maximum performance.
How Noisy Are Different Bathroom Exhaust Fans?
Did you know that most bathroom exhaust fans range from 1 to 4 sones, roughly 24 to 60 decibels? Noise levels vary, with quieter fans typically rated below 1.5 sones (around 30 decibels), perfect for peaceful mornings. Higher-rated fans produce louder noise, but they often move more air. When choosing, check the fan decibel ratings to find a balance between performance and comfort in your space.
How Often Should I Clean or Replace the Fan?
You should clean your bathroom exhaust fan at least every six months to maintain ideal performance. Follow a regular maintenance schedule, including removing dust and debris from the fan blades and cover. Typically, replacement frequency depends on usage and wear, but most fans last about 8-15 years. If the fan becomes noisy or less effective despite cleaning, it’s time to contemplate replacing it to guarantee proper ventilation and prevent mold.
Can I Install an Exhaust Fan in a Bathroom With No Existing Vent?
Like forging a new trail, installing an exhaust fan in a bathroom with no existing vent is possible. You’ll need to assess ventilation requirements and find suitable fan placement, usually on an exterior wall or ceiling. You’ll also need to create an opening for ductwork, ensuring proper airflow. While it takes more effort, it’s doable, and you’ll improve moisture control and air quality just as pioneers improve new paths.
Broan-Nutone® Bathroom Exhaust Fan, 50 CFM Modern Grille, Energy Star Fan, 2.0 Sones
50 CFM BATHROOM EXHAUST FAN: 50 CFM is sufficient ventilation to remove, moisture, odor and pollutants from your…
As an affiliate, we earn on qualifying purchases.
As an affiliate, we earn on qualifying purchases.
Conclusion
Now that you’ve navigated the nuances of installing your bathroom exhaust fan, you’re equipped to guarantee freshness and freedom from fumes. With confidence and clarity, you’ve conquered the challenge, creating a cleaner, healthier space. Remember, a successful setup starts with patience and precision—persistence pays off! So, take pride in your project, and enjoy the fresh air flowing freely, thanks to your hard work. You’ve truly taken a step toward a cleaner, more comfortable bathroom!

Broan-NuTone WVK2A Flexible Wall Ducting Kit for Ventilation Fans, Exhaust Fan 9-Piece Duct Kit, 4-Inch
DUCTING KIT: 9-piece kit includes everything you'll need for replacing your exhaust fan's ducting
As an affiliate, we earn on qualifying purchases.
As an affiliate, we earn on qualifying purchases.

JOEAONZ Bathroom Exhaust Fan 110 CFM Very Quiet with Matel Housing, Ceiling Mount Ventilation Fan Large Air-flow Capacity, Energy-Saving Household Bath Vent Extractor, White Plastic Grille
【Power Fan & Low Noise】Quiet, energy efficient bathroom exhaust fan come with 110 CFM large airflow capacity to…
As an affiliate, we earn on qualifying purchases.
As an affiliate, we earn on qualifying purchases.