
To replace baseboards, start by scoring along the edges with a utility knife to break the paint seal, then gently pry them away with a pry bar to avoid wall damage. Remove stubborn nails with a hammer or nail puller. Next, measure and cut your new trim accurately at angles for neat corners, then nail it into place. Finish by filling nail holes, caulking edges, and touching up paint for a polished look. If you continue, you’ll discover how to choose perfect styles and colors.
Key Takeaways
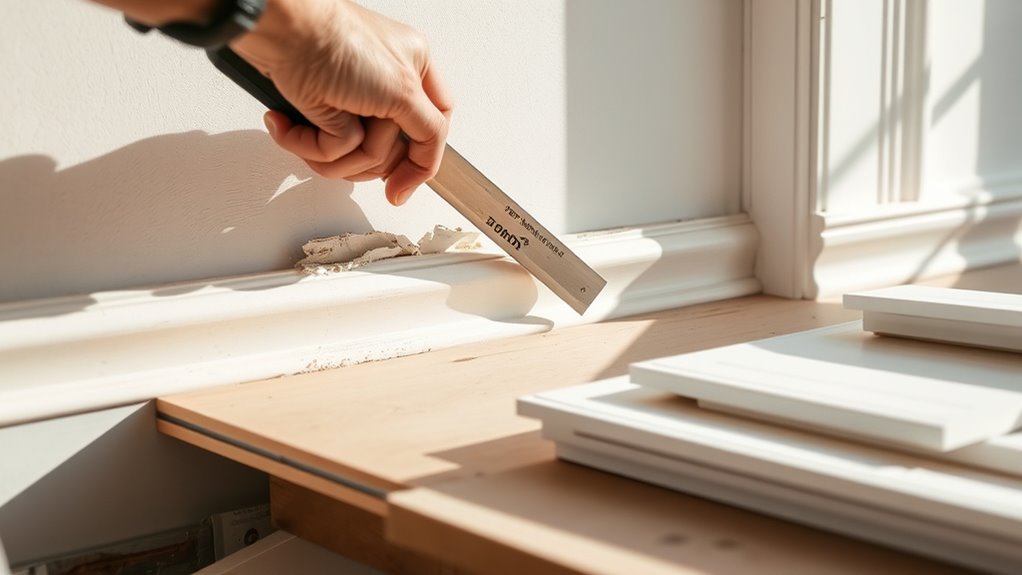
- Score along the edges where the baseboard meets the wall to break the paint seal before gently prying it away.
- Remove nails carefully with a hammer or nail puller to avoid damaging drywall or paint.
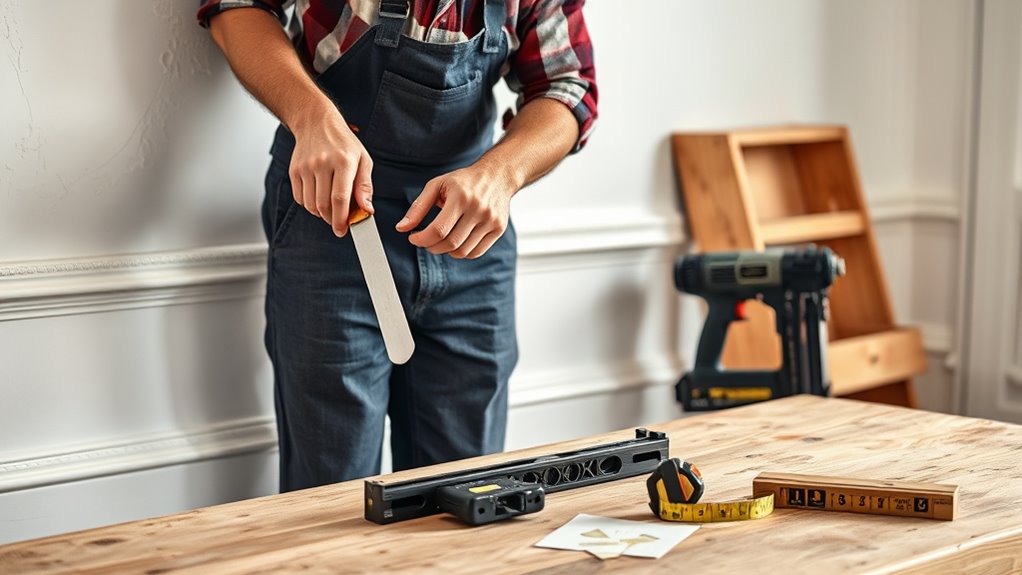
- Measure and cut new trim precisely with a miter saw, using angled cuts for corners.
- Secure the new baseboard with finishing nails, then fill nail holes with wood filler and sand smooth.
- Caulk along edges for a seamless look, then paint or stain to match or contrast with existing decor.
Replacing Baseboards
Are your baseboards looking worn out or outdated? If they’re dull, chipped, or don’t match your current style, replacing them is a straightforward way to refresh your space. Before you start, consider the overall look you want to achieve. Think about how paint colors can influence the room’s vibe—whether you prefer a crisp white for a classic feel or a bold hue to make a statement. Your choice of trim styles can also dramatically change the ambiance, from simple and clean lines to more ornate designs that add character. Knowing what style and color will blend seamlessly with your decor makes the replacement process smoother and ensures your new baseboards enhance the room.
Begin by removing the existing trim carefully. Use a utility knife to score along the edges where the baseboard meets the wall, breaking the paint seal. Then, gently pry the baseboard away from the wall with a pry bar, working slowly to avoid damaging the drywall or paint. If nails are stubborn, use a hammer or a nail puller to extract them with minimal damage. Once the old baseboards are removed, clean the area thoroughly. Check the wall for any damage or gaps that need filling before installing the new trim. Additionally, understanding mount, OTA, and camera comparisons can help ensure the overall aesthetic and proportions of your new trim suit the room’s proportions and style.
Carefully remove old trim, score with a utility knife, and pry gently to avoid wall damage.
When selecting your new baseboards, think about the trim styles that best fit your space. For a modern look, choose sleek, flat profiles with minimal detailing. If you prefer a more traditional or elegant appearance, opt for moldings with decorative edges or intricate designs. The height and thickness of the baseboards also matter—higher, thicker styles tend to make a bold statement, while smaller, simpler profiles are more subtle. As for paint colors, many homeowners go with a fresh coat of white to keep things neutral and versatile, but don’t hesitate to pick a color that complements your walls or contrasts for visual interest.
Installing new baseboards involves measuring and cutting your trim to fit each wall precisely. Use a miter saw to make clean, angled cuts at corners, ensuring tight joints. Secure the trim to the wall with finishing nails, keeping the nail head slightly below the surface. Fill any nail holes with wood filler, then sand smooth. Once the trim is in place, you can paint or stain it to match your desired finish. If you’re painting, choose a semi-gloss or gloss paint for durability and easy cleaning. When all is set, caulk along the top and bottom edges to ensure a seamless look, then touch up your paint. With these steps, you’ll transform your space and enjoy the fresh appeal of updated baseboards that align with your style and color choices.

Goldblatt Trim Puller, 4-Inch Tile Removal Multi-Tool for Commercial Work & Home Improvement, Baseboard, Molding, Siding and Floor Removal, Remodeling
Trim Saving – The trim removal tool has a larger, flatter and wider contact area than clumsy traditional…
As an affiliate, we earn on qualifying purchases.
As an affiliate, we earn on qualifying purchases.
Frequently Asked Questions
What Tools Are Best for Removing Old Baseboards?
To remove old baseboards, you’ll want a pry bar and a putty knife for effective removal. Wear safety equipment like gloves and eye protection to keep yourself safe during the process. Use gentle removal techniques to avoid damaging the wall or surrounding trim. A hammer can help if the baseboards are nailed tightly. These tools and techniques make the job easier and safer, ensuring a smooth progression to installing new trim.
How Do I Repair Damaged Wall Surfaces Before Installing New Trim?
To repair damaged wall surfaces before installing new trim, start with wall repair by filling holes and cracks using spackle or joint compound. Sand the patched area smooth for a seamless surface. Proper surface preparation is key, so clean the wall thoroughly, removing dust and debris. Once the surface is even and dry, you can confidently install your new trim, ensuring a clean, professional look.
Can I Replace Baseboards Myself Without Professional Help?
You can definitely take on DIY installation of your baseboards, transforming your space like a skilled artist. With patience, a few tools, and clear instructions, you’ll save on labor costs and gain a sense of accomplishment. Just remember, measure twice, cut once, and be prepared for some hands-on work. No need to hire out—your home improvement project can be a rewarding adventure, all within your budget.
What Are the Common Mistakes to Avoid During Installation?
You should avoid rushing the measurement accuracy, as mistakes here can lead to gaps or uneven cuts. Double-check your measurements before cutting, and use a level to make certain straight installation. Be careful with paint color coordination; mismatched shades can detract from your finished look. Also, don’t forget to sand edges smoothly and securely attach your baseboards to prevent gaps or warping over time. These steps help ensure a professional-looking result.
How Do I Match New Baseboards With Existing Decor Styles?
Imagine your room’s decor style flowing seamlessly from walls to trim. To match new baseboards, consider your existing decor style—classic, modern, rustic—and pick designs that complement it. Use color matching to guarantee the baseboards blend or contrast tastefully, depending on your vision. Pay attention to details like finish and texture, creating harmony. This way, your new baseboards will enhance your space, making everything feel cohesive and inviting.

Metabo HPT 10-Inch Single Bevel Compound Miter Saw, 15-Amp Power Saw with Xact Cut Shadow Line, Precision Miter Angles, Single Bevel 0-45°, 40T TCT Miter Saw Blade, Lightweight Design, C10FCG2
POWERFUL AND PRECISE: This 10-inch single bevel compound miter saw features a 15-Amp motor delivering high power for…
As an affiliate, we earn on qualifying purchases.
As an affiliate, we earn on qualifying purchases.
Conclusion
Now that you’ve learned how to remove and install new baseboards, you’re all set to refresh your space. It’s funny how a simple project like this can transform a room, isn’t it? Sometimes, the smallest updates make the biggest difference, turning a plain wall into something special. With your new trim in place, you’ll enjoy that satisfying sense of accomplishment every time you step into the room. Happy decorating—your perfect finish is just a trim away!

Metabo HPT Finish Nailer with Air Duster, Pro-Preferred Pneumatic Power Nailers, Ideal for Molding, Chair Rail, and Cabinetry, Lightweight 3.7 lbs, 16 Gauge, 1″ to 2-1/2″ Finish Nails, NT65M2S
AWARD: Rated the Pro Preferred Nailer for 12 years running (2014 – 2025) by Builder and Developer Magazine
As an affiliate, we earn on qualifying purchases.
As an affiliate, we earn on qualifying purchases.
Gorilla All Purpose Wood Filler, Natural Color, 6 Ounce Tube (Pack of 1) – Water Resistant for Indoor or Outdoor Projects and Repairs
Gorilla tough: Gorilla Wood Filler is the go-to product for strong water resistant repairs on cracks, gouges and…
As an affiliate, we earn on qualifying purchases.
As an affiliate, we earn on qualifying purchases.