To remove a popcorn ceiling yourself, start by protecting your space with plastic sheeting and wearing goggles, gloves, and a mask. Test a small area with water to soften the texture, then spray the ceiling and wait for about 15-20 minutes. Use a wide putty knife or drywall scraper to gently lift the softened texture. After removal, smooth out the surface with sanding and repairs. For detailed guidance, discover all the essential tips to finish your project confidently.
Key Takeaways
- Protect your space by covering furniture and floors with plastic sheets before starting removal.
- Spray water on popcorn texture, wait 15-20 minutes, then gently scrape it off with a wide putty knife.
- Inspect and clean the ceiling surface, then sand rough areas and repair imperfections for a smooth finish.
- Use proper tools, wear protective gear, and ensure good ventilation to stay safe during the removal process.
- Consider testing for asbestos if the ceiling predates the 1980s and consult safety resources for best practices.

Removing a popcorn ceiling can substantially improve the look of your space, but it’s a project that requires careful preparation and proper technique. The first step is understanding texture removal and ceiling preparation. Before you start, clear the room and cover furniture and floors with plastic sheets to protect against dust and debris. Wear protective gear like goggles, gloves, and a mask because scraping old texture can create a mess and release dust particles that may contain asbestos if your ceiling was installed before the 1980s.
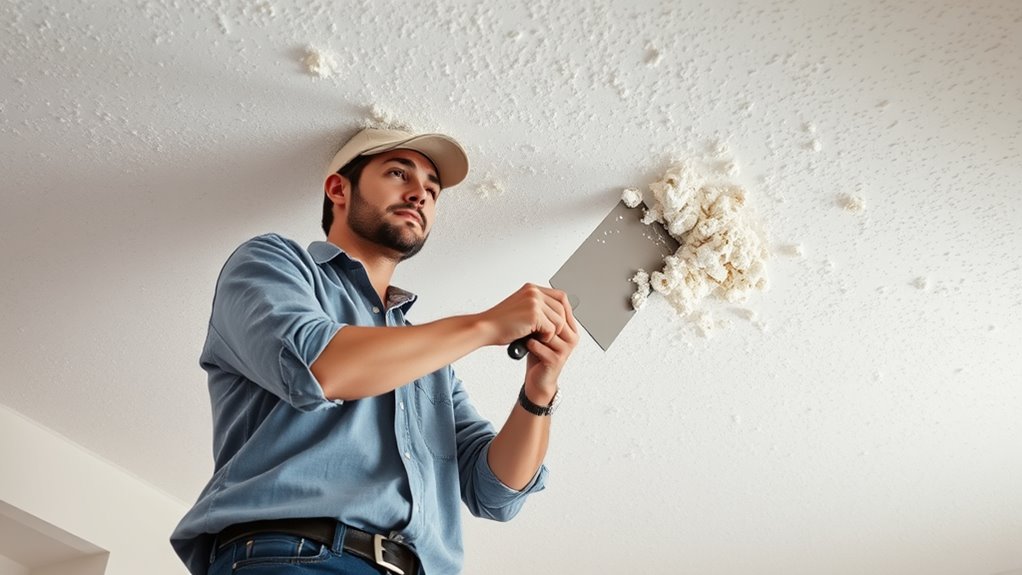
Begin with ceiling preparation by testing a small section of the popcorn texture. Spray water on the area with a spray bottle or garden sprayer, allowing it to soak for about 15-20 minutes. This softens the texture and makes it easier to remove. Be careful not to oversaturate, as excess water can damage the drywall underneath. Once the texture is damp, use a wide putty knife or drywall scraper to gently lift and scrape away the popcorn. Work in small sections, maintaining steady pressure to avoid gouging or damaging the ceiling surface.
Test a small popcorn area with water to soften before scraping for easier removal.
As you proceed, remember that texture removal is a delicate process. If you encounter stubborn patches, reapply water and wait a few minutes before trying again. Patience is key here. After you’ve scraped off all the popcorn, inspect the ceiling for any remaining bits of texture and remove them with a damp sponge or cloth. If the surface feels rough or uneven, you might need to sand it lightly with fine-grit sandpaper to create a smooth finish. This step helps prepare the ceiling for the next phase, whether you plan to paint or install new texture. Additionally, understanding asbestos safety is crucial if your ceiling was installed before the 1980s, as disturbance of asbestos-containing materials requires special precautions. It’s also helpful to research proper techniques for texture removal to ensure a safe and effective process. Proper tool selection with the right tools can make the removal process more efficient and reduce the risk of damage.
Throughout the project, keep the workspace well-ventilated and regularly clean up debris to prevent dust buildup. Proper ceiling preparation isn’t just about removing the popcorn; it’s about creating a clean, smooth surface that’s ready for your desired finish. If your ceiling has existing cracks or imperfections, now is the time to repair them with joint compound and allow it to dry thoroughly before sanding smooth. Furthermore, consulting support resources can provide guidance and safety tips specific to your situation.
Top picks for "popcorn ceil gone"
Open Amazon search results for this keyword.
As an affiliate, we earn on qualifying purchases.
Frequently Asked Questions
Can I Remove Popcorn Ceiling Without Professional Help?
Yes, you can remove a popcorn ceiling without professional help. Start with DIY preparation by testing for asbestos and covering furniture. Spray the ceiling with water, then gently scrape off the popcorn texture. Guarantee paint compatibility before repainting, so your new finish adheres well. Taking your time and following safety precautions makes this manageable, saving you money and giving your space a fresh, modern look.
How Long Does Popcorn Ceiling Removal Typically Take?
Removing a popcorn ceiling typically takes a day or two, like peeling away layers of a story. You’ll need to contemplate cost considerations, especially for tools and safety precautions, like wearing goggles and masks. The process flows faster if you prep thoroughly and work steadily, but rushing can cause messes or accidents. Plan your project in stages, stay cautious, and you’ll see that ceiling transform before your eyes within a manageable timeframe.
Is It Safe to Remove Popcorn Ceiling With Asbestos?
Removing a popcorn ceiling with asbestos isn’t safe to do yourself. Asbestos risks can cause serious health problems if inhaled, so it’s best to hire trained professionals. They use proper safety precautions like wearing protective gear and containing the area to prevent asbestos fibers from spreading. Never attempt asbestos removal on your own, as improper handling increases health hazards. Always prioritize safety and expert guidance for asbestos-containing ceilings.
What Tools Are Essential for DIY Popcorn Ceiling Removal?
You’ll need essential tools like a spray bottle or garden sprayer to dampen the ceiling, a putty knife or scraping tool to remove the popcorn, and a sturdy ladder to reach high areas. Don’t forget safety gear—goggles, a dust mask, and gloves—to safeguard yourself from debris and dust. These tools and safety precautions ensure a smooth, safe popcorn ceiling removal process.
How Much Does Popcorn Ceiling Removal Usually Cost?
The cost estimate for popcorn ceiling removal usually ranges from $1 to $3 per square foot, including labor and material expenses. You might spend more if your ceiling has multiple layers or requires special treatments, like asbestos testing. To budget effectively, consider the size of your ceiling and any additional supplies needed. Doing it yourself can save money, but factor in your time and tools for a more accurate estimate.
Conclusion
Removing a popcorn ceiling is like peeling away a stubborn mask, revealing a fresh, smooth surface underneath. With patience and the right tools, you can transform your space yourself, saving money and gaining pride in your work. Remember to stay safe, wear protective gear, and take your time. Once finished, you’ll enjoy a modern, updated look that feels as bright as a sunny sky. So go ahead—tackle this project and enjoy the rewarding payoff!