To patch a hole in drywall, start by cleaning around the damaged area and cutting out any loose material with a utility knife. For small holes, apply mesh tape directly and cover it with drywall compound, feathering the edges smoothly. For larger holes, cut a drywall patch to fit, secure it with screws, then cover with compound and sand smooth once dry. Finish by priming and painting for a seamless look, and if you continue through the process, you’ll master the entire repair step-by-step.
Key Takeaways
- Clean and cut around the hole, removing loose debris and jagged edges for a smooth surface.
- For small holes, apply mesh tape directly; for larger ones, cut and secure a drywall patch.
- Spread drywall compound over the patch, feathering edges for a seamless blend, and let it dry completely.
- Sand the dried compound lightly to smooth imperfections, then apply a second coat if needed and sand again.
- Finish by priming and painting the area for a seamless, durable repair that blends with the wall.
Drywall damage is common, but fixing it isn’t complicated when you know the right steps. The first step is gathering the tools needed to make the repair smooth and efficient. You’ll want a putty knife, a sanding sponge or block, a utility knife, drywall compound, and a drywall patch or mesh tape. Having a paintbrush or roller for finishing touches is also helpful. Knowing the tools needed upfront prevents delays and ensures you have everything on hand. It’s also important to be aware of common mistakes, like over-applying compound or rushing the sanding process, which can make the repair look uneven or noticeable.
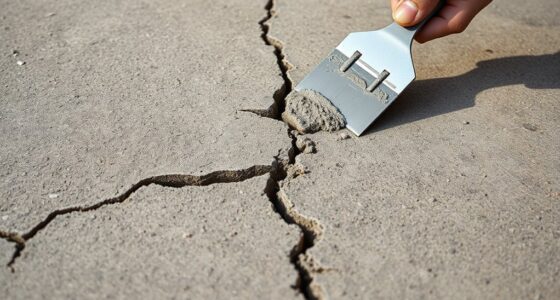
Once you have your tools ready, start by cleaning the damaged area. Remove any loose drywall or debris using your utility knife or a putty knife. Be careful not to enlarge the hole unnecessarily; just clear away any jagged edges or loose material. If the hole is small, you can apply mesh tape directly over it, but for larger holes, it’s best to cut a piece of drywall that fits the hole, then secure it with drywall screws or nails. This step helps create a sturdy patch and prevents future cracking. Additionally, proper preparation can make the entire repair process easier and more effective. Using the right patching technique can also influence the durability of the repair, especially for larger holes. Incorporating proper drywall techniques ensures a more professional and long-lasting fix. Paying attention to surface preparation is crucial for achieving a seamless finish and avoiding visible imperfections.
Start by cleaning the damaged area without enlarging the hole unnecessarily.
Next, apply drywall compound over the patch or mesh tape. Use your putty knife to spread a thin, even layer, feathering the edges so it blends seamlessly with the surrounding wall. Avoid the common mistake of overloading the knife with too much compound, which can cause drips and uneven surfaces. Allow the compound to dry completely, which might take a few hours or overnight, depending on the product used. Once dry, lightly sand the area with a sanding sponge or block to smooth out any ridges or bumps. Be gentle during sanding to avoid damaging the drywall surface or creating new imperfections. Proper drywall finishing techniques are essential for achieving a professional-looking repair.
After sanding, inspect the patch closely. If you notice any imperfections, apply a second coat of drywall compound, feathering it out to blend better. Sand again once it dries. When you’re satisfied with the smoothness, wipe away any dust and prepare for painting. Use a primer if needed to ensure the paint adheres well and the repair doesn’t stand out. Finish by painting over the patched area, blending it with the rest of your wall. Proper finishing techniques ensure a seamless appearance and help the repair blend naturally into the existing wall. Taking care during each step guarantees a durable, visually appealing result.
Frequently Asked Questions
Can I Use Spackle Instead of Joint Compound?
Yes, you can use spackle instead of joint compound for small holes or cracks, but keep in mind that spackle dries faster and is less durable. When applying, use spackle for quick fixes and joint compound for larger repairs or for a smoother finish. Application tips include applying in thin layers, sanding between coats, and ensuring the patch blends seamlessly with the wall for the best results.
How Long Does Drywall Mud Take to Dry?
Drywall mud typically takes 24 hours to dry fully, but drying time depends on humidity levels and thickness. If you apply a thin layer, it might dry in a few hours, but thicker coats can take longer. Keep the area well-ventilated to help moisture escape, and check the mud’s dryness before sanding or painting. Patience pays off for a smooth, professional finish!
Is It Necessary to Sand After Patching?
Yes, you should sand after patching to achieve a smooth finish. The sanding process helps eliminate any ridges or uneven spots left from applying drywall mud and guarantees your surface blends seamlessly with the surrounding wall. Use fine-grit sandpaper and gentle strokes. This step is vital for applying finishing techniques like priming and painting, making your repair look professional and polished. Skipping sanding can leave imperfections visible.
Can I Patch Holes in Textured Drywall?
Yes, you can patch holes in textured drywall, but it requires extra care to maintain the textured finish. You should match the existing textured pattern by applying a similar technique or using a textured spray. After patching, blend the repair into the drywall aesthetics by feathering the edges and reapplying texture. This ensures the repair isn’t noticeable and preserves the original look of your textured finishes.
What Tools Are Essential for Drywall Repair?
For drywall repair, your tools overview should include a putty knife, utility knife, sanding block, drywall compound, and a drywall saw. Safety precautions are essential—wear safety goggles and a dust mask to protect your eyes and lungs from debris. Keep a sturdy ladder nearby, and make certain your workspace is well-ventilated. With these tools and safety measures, you can confidently tackle drywall patches efficiently and safely.
Conclusion
Now that you know how to patch a drywall hole, you’re equipped to handle this repair like a pro. Think of it as patching a tiny crack in your armor—once fixed, it’s as good as new, ready to face whatever comes next. With a little patience and the right tools, you’ve turned a small problem into a smooth, seamless finish. So go ahead, roll up your sleeves—you’ve got this!