
To effectively seal your doors and windows, start by choosing the right weatherstripping material like foam tape or vinyl, and guarantee surfaces are clean before application. Measure gaps carefully and press the strips firmly into place, making sure there are no air leaks. Regular inspection and maintenance are key to keeping your home energy-efficient and comfortable. Keep going to discover simple techniques and tips that can boost your sealing success even more.
Key Takeaways
- Choose the appropriate weatherstripping type based on gap size and surface, such as foam tape or vinyl.
- Clean and dry surfaces thoroughly before applying weatherstripping for better adhesion.
- Measure carefully and cut weatherstripping to fit snugly around door and window frames.
- Press firmly to ensure a tight seal, using tools like a putty knife if needed.
- Regularly inspect and replace worn or damaged strips to maintain energy efficiency and prevent drafts.

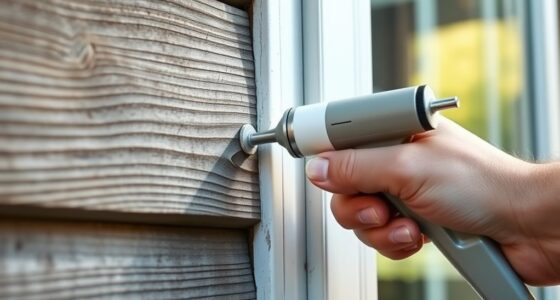
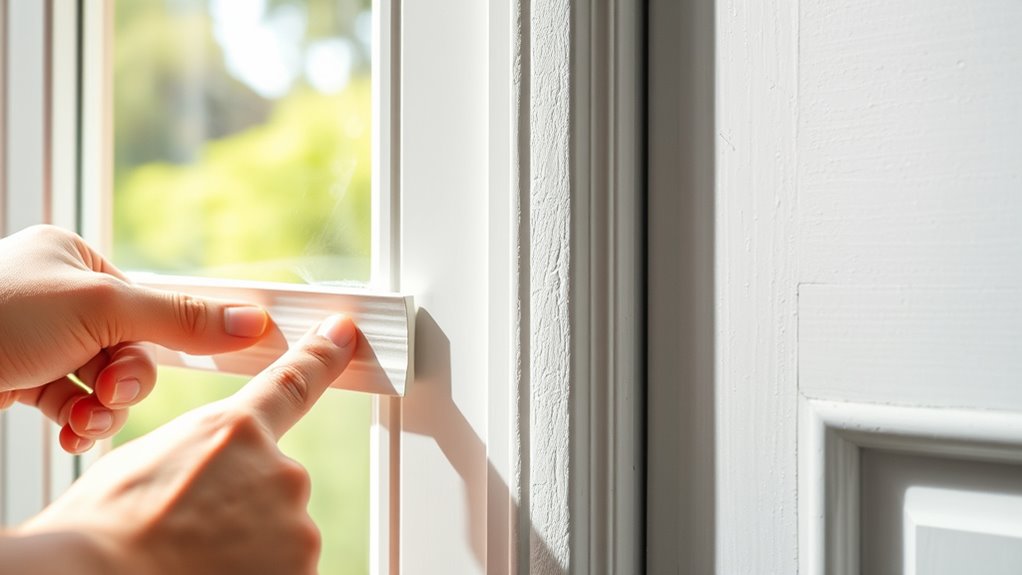
Weatherstripping is an essential DIY fix that can save you money and improve your home’s energy efficiency. When you focus on sealing gaps around your doors and windows, you prevent drafts that cause your heating and cooling systems to work harder. To do this effectively, understanding insulation types and sealing techniques is key. Different insulation types, like foam tape, vinyl, or rubber, each have unique benefits and are suited for specific applications. Foam tape is flexible, easy to install, and works well on irregular surfaces. Vinyl and rubber weatherstripping are more durable and better suited for areas exposed to frequent use or weather changes. Choosing the right insulation type depends on the location and the size of the gap you’re sealing. Proper sealing techniques are equally important. You want to ensure the weatherstripping is firmly pressed into place to block air leaks completely. Clean the surface before applying any material to guarantee good adhesion. For larger gaps, you might need to use a combination of weatherstripping and caulk for a tighter seal. When applying foam tape or vinyl strips, measure carefully to cut pieces that fit snugly without excess. Don’t forget to check for any uneven surfaces or warped frames that might prevent a good seal; sometimes, you need to adjust or replace the frame itself for the best results. Applying the weatherstripping consistently around the door or window frame is vital — uneven application can leave gaps that defeat the purpose. You might find that sealing techniques like using a putty knife to press the weatherstripping into grooves or corners helps achieve a more secure fit. It’s also wise to test your work by feeling for drafts after installation. If you notice any air sneaking through, you may need to add additional strips or reapply the existing ones. Regularly inspecting and maintaining your weatherstripping guarantees it continues to perform well over time. As weather conditions change, some types of insulation may wear out or become less effective, so replacing worn or damaged strips is important. Understanding how ventilation considerations affect your sealing efforts can also help improve overall home efficiency. By paying attention to insulation types and sealing techniques, you’ll make sure your home stays comfortable and energy-efficient. Not only does this save you on utility bills, but it also reduces your carbon footprint. With a little effort and careful selection of materials, weatherstripping becomes an easy and cost-effective way to improve your home’s overall performance.

16Feet Weather Stripping Seal (1/2 Inch X 1/4 Inch) for Door Window, High Density Foam Tape, Soundproofing, Insulation Strip, Door Sealers for Door Frame- White
Effective Weather Stripping Seal: Our high-density foam tape is designed for superior sealing, making it perfect for both…
As an affiliate, we earn on qualifying purchases.
As an affiliate, we earn on qualifying purchases.
Frequently Asked Questions
How Long Does Weatherstripping Typically Last Before Replacement?
Weatherstripping usually lasts about 3 to 5 years before you need to substitute it. To maximize its lifespan, follow proper installation tips and perform a regular maintenance schedule. Check for cracks, gaps, or wear, and replace worn-out strips promptly. Keeping your weatherstripping in good condition ensures your home stays energy-efficient and comfortable, saving you money on heating and cooling costs over time.
Can Weatherstripping Be Applied on Uneven or Textured Surfaces?
You might feel like a pioneer steering the wild west, but yes, weatherstripping can be applied on uneven or textured surfaces. For best uneven surface adaptation and textured surface adhesion, choose flexible, foam, or rubber weatherstripping. Press firmly to guarantee a good seal and consider using adhesive-backed options for better adhesion. Proper prep and selecting the right type make all the difference for effective sealing on tricky surfaces.
Is Weatherstripping Safe for All Types of Door and Window Frames?
Weatherstripping is generally safe for most door and window frames, but you should check door frame compatibility and material safety first. Some materials, like aluminum or certain plastics, may react with specific weatherstripping types. Always choose weatherstripping designed for your frame material and follow manufacturer instructions. If you’re unsure, test a small area or consult a professional to ensure proper adhesion and avoid damage.
What Are the Best Weatherstripping Options for Extreme Weather Conditions?
For extreme weather, you should choose weatherstripping with high insulation effectiveness and material durability. Consider foam tape or rubber seals, as they adapt well to temperature fluctuations and resist cracking or tearing. You might also opt for vinyl or silicone options, which maintain their sealing properties under harsh conditions. These choices guarantee your doors and windows stay well-insulated, saving energy and preventing drafts during severe cold or heat.
How Do I Dispose of Old Weatherstripping Material Responsibly?
Did you know that over 300 million pounds of weatherstripping waste end up in landfills annually? To dispose of old weatherstripping responsibly, explore recycling options like local recycling centers or specialized disposal methods for materials like rubber and foam. Check your city’s waste management guidelines, or consider repurposing some parts if possible. Proper disposal helps reduce environmental impact and promotes sustainable waste practices.

M-D Building Products 78394 17 ft. White Vinyl Gasket Weatherseal for Doors & Windows
Made of vinyl
As an affiliate, we earn on qualifying purchases.
As an affiliate, we earn on qualifying purchases.
Conclusion
Now that you know the basics of weatherstripping, you’re well on your way to sealing up leaks like a pro. Think of it as giving your home a cozy sweater—keeping cold drafts out and warmth in. With a little effort, you’ll save energy and money while making your space more comfortable. So, grab your supplies and start sealing—your home will thank you, and you’ll enjoy a warmer, more efficient haven all year round.

Holikme Weather Stripping Door Seal Strip 33 Feet, Sealing Sticker Sealing Tape for Door Draft Stopper Adhesive for Doors, Suitable for Windows, Doors
Upgraded xetended long: weather stripping each roll of weather seal is 1.8 inches wide and can cover gaps…
As an affiliate, we earn on qualifying purchases.
As an affiliate, we earn on qualifying purchases.

TorSor 2 Pack Rubber Edge Trim Install Tool Set Seal Strip Setting Stick Closing Roller for Automotive Weather Stripping Car Windshield Weatherstrip Boat RV Truck Home Window Screen Door Installation
Package Included: 1*Screen Roller Tool + 1*Glazing Shovel
As an affiliate, we earn on qualifying purchases.
As an affiliate, we earn on qualifying purchases.