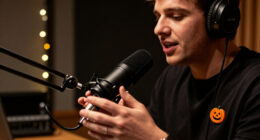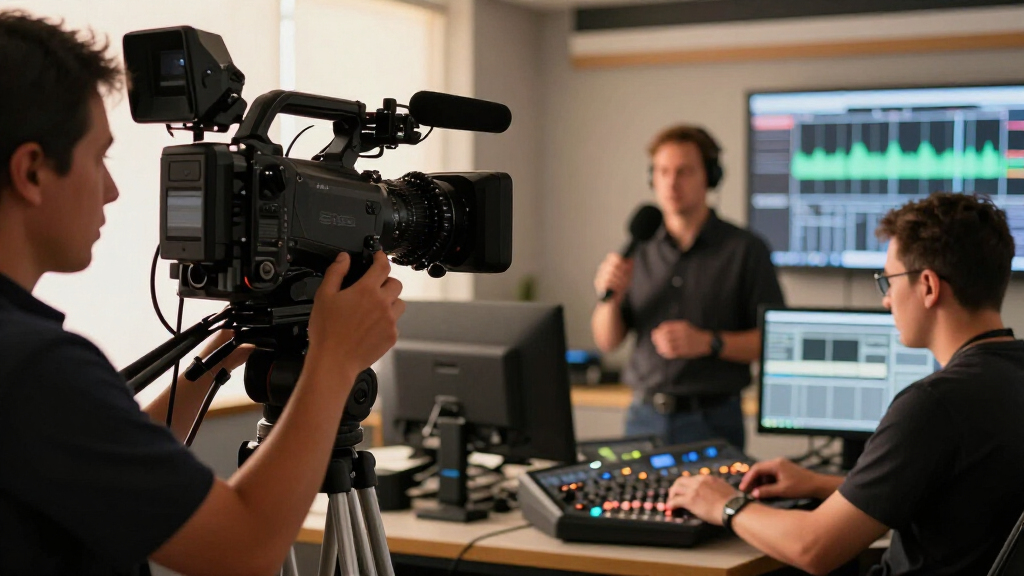
This checklist is for news teams building or refreshing a studio setup for interviews, live segments, and recorded reports. It covers camera, switching, and lighting, along with guidance for choosing a teleprompter, microphone, and acoustic panels.

Get everyday essentials delivered free with Prime
- Fast, free delivery on millions of items
- Prime Video, Amazon Music and more included
- Member-only deals all year
The sections follow the main production path: capture the picture, prepare presenter copy and sound, switch between sources, shape the lighting, and manage room acoustics. The named products are the picks for the camera, switcher, and lighting slots; the remaining sections offer selection advice.
Use each section to check the needs of your room and workflow before buying. Confirm connections, mounting, and power against the equipment you already have, and test the setup together before relying on it for a production.
Video Camera
The camera is the foundation of the studio image, so choose around how your team frames and records each kind of segment. The Canon XF605 4K Camcorder with 15x Optical Zoom (5076C002) Bundle is the listed pick for this slot. Before selecting a camera, consider whether operators need to move between tight and wide shots, how the camera will connect to the rest of the studio, and who will handle focus and framing. Workflow fit matters as much as the camera name: a capable device can still slow production if the crew cannot operate it comfortably. A common buying mistake is to focus on a headline capability while overlooking the practical setup. Check the exact bundle contents, required cables, tripod or mounting needs, and power arrangements. Confirm that the camera’s outputs match the switcher or capture path you intend to use, and that the desired recording format fits your editing workflow. Check compatibility with the rest of the chain before committing. If possible, rehearse a typical segment with the camera in its intended position so the team can assess framing, controls, and handoffs.What to look for:
- Confirm camera outputs match the planned switcher inputs.
- Check the bundle contents and any separately needed cables or mounts.
- Choose framing and zoom needs for the studio’s typical shots.
- Verify the recording format fits the team’s editing workflow.
- Rehearse operation from the intended camera position.
Canon XF605 4K Camcorder with 15x Optical Zoom (5076C002) Bundle
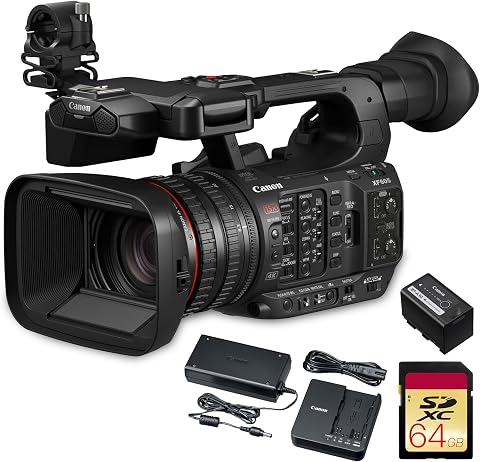
The Canon XF605 is a professional 4K HDR camcorder featuring a 1" CMOS sensor, 15x optical zoom, dual pixel autofocus, and built-in Wi-Fi. It offers high-quality UHD recording with advanced connectivity options, compact design, and customizable controls suitable for broadcast, documentary, and event production.
Pros:
- High-quality 4K UHD recording with excellent color and dynamic range
- Advanced autofocus and low-light performance
- Versatile, compact design suitable for on-location shoots
- Multiple connectivity options for seamless workflow
Cons:
- Relatively expensive for casual users
- Complex controls may require some learning curve
- Limited internal storage, relies on external media
Best for: Teams that want a camcorder with optical zoom for studio shots.
Not ideal for: Crews whose workflow requires connections or mounts not confirmed for this bundle.
Bottom line: Confirm the bundle contents and signal path before making this camera the center of the studio setup.
Teleprompter
A teleprompter helps presenters deliver prepared copy while keeping their attention near the camera. It is especially useful when a segment depends on consistent wording, names, or figures. For a news studio, assess how often presenters read scripted material, how much copy they need to see at once, and whether a prompter can be placed without disrupting the camera position. Presenter comfort should guide the choice as much as screen size or feature lists. A frequent mistake is choosing a unit without checking the camera, lens, and mounting arrangement together. Confirm the prompter’s supported device dimensions, mounting method, and available space around the lens; then verify that the display and controls suit the way your team prepares and advances scripts. Consider who will operate it and whether the presenter can read naturally at the planned distance. Test the complete setup with real copy before a live segment, checking for readable text, smooth scrolling, and unobstructed framing. Avoid assuming a prompter will fit every camera configuration without checking its specifications.What to look for:
- Match the prompter mount to the camera and support setup.
- Check supported tablet or display dimensions.
- Assess readability at the presenter’s planned distance.
- Confirm how scripts are loaded and advanced.
- Rehearse with representative copy and the intended camera framing.
Studio Microphone
Clear speech is central to studio news, so select a microphone around the room, presenter position, and production chain. Decide whether the setup needs one fixed microphone, a wearable option, or coverage for more than one speaker. Consider how the mic will be positioned, how it connects to the mixer or camera, and who will monitor levels during a segment. Speech intelligibility is the goal; a feature list alone cannot tell you how a microphone will behave in your actual room. A common mistake is buying a microphone without checking connection type, mounting needs, or the room’s existing noise. Confirm the required input and any power or adapter needs with the equipment it will feed. Think through mic placement and whether it will appear in frame or interfere with the presenter’s movement. Test it from the intended speaking position, with the studio quiet and during typical activity, and listen back on the same kind of system viewers will use. Check the whole signal path before choosing accessories, and include a plan for monitoring and handling the mic between takes.What to look for:
- Match the microphone connection to the mixer or camera input.
- Choose a form factor suited to presenter movement and framing.
- Confirm mounting, power, and adapter requirements.
- Listen to a test recording from the actual speaking position.
- Plan how the crew will monitor and manage the microphone.
Video Switcher
A switcher brings camera and other video sources together so an operator can manage a program feed. The listed pick is the Osee GoStream Duet Multiple Camera SDI and HDMI Live Stream Video Mixe. Before choosing a switcher, map the sources you plan to use and the destinations that need a signal. Note which devices use SDI or HDMI, how many inputs the workflow needs, and whether the production also requires streaming or recording connections. Source compatibility is the first practical check. A common mistake is counting devices without confirming their connectors, formats, and routing needs. Check the exact model specifications and determine whether adapters or additional equipment would be required for your cameras, computers, monitors, and network workflow. Consider the operator’s position and the controls needed during a segment, then rehearse transitions between all planned sources. Confirm what the switcher sends to each destination and how audio will be handled in the same workflow. Verify the full signal path before building the studio around a product name, especially when the listed name is truncated. A written input-and-output map helps expose mismatches before installation.What to look for:
- Inventory every source and destination before selecting inputs.
- Match SDI or HDMI connections to the actual devices.
- Check format and routing requirements in the model specifications.
- Confirm streaming, recording, and audio handling needs.
- Rehearse source changes with the planned operator and equipment.
Osee GoStream Duet Multiple Camera SDI and HDMI Live Stream Video Mixer Switcher

The Osee GoStream Duet is a professional live streaming video mixer supporting multiple SDI, HDMI, USB-C, NDI HX sources, and SD/SSD playback. It offers versatile control options, rich key effects, transitions, and the ability to stream to multiple platforms simultaneously, making it ideal for live events and broadcasts.
Pros:
- Supports a wide range of input sources including SDI, HDMI, USB-C, and NDI HX
- Multiple control options for flexible operation
- Enables streaming to multiple platforms simultaneously
Cons:
- Requires firmware update to unlock free NDI HX license
- May be complex for beginners due to advanced features
Best for: Studios planning a workflow with multiple video sources.
Not ideal for: Setups whose exact connector and output needs remain unchecked.
Bottom line: Map the entire signal path and confirm the full product model before purchase.
Studio Lighting Kit
Lighting helps create a consistent picture across presenters, interviews, and changing studio conditions. The listed pick is the Godox LP600R 60W RGB LED Light Panel 2-Light Kit with Battery Power, S. Think about the space available, where lights can be placed, and whether the team needs to reposition them between segments. Room and subject fit should shape the kit choice: a layout that works for one presenter may need adjustment for a wider scene or additional guests. A common mistake is choosing lights without checking stands, mounting, power, and control needs. Confirm what the kit includes and whether it suits the intended placement and existing power arrangements. Consider how the lights will be controlled and whether the crew can make repeatable adjustments from segment to segment. Test the planned arrangement with the camera in its final position, checking for unwanted shadows, reflections, and changes in the shot as presenters move. Rehearse the lighting layout with the actual set and camera settings, then document placements that work so the team can reproduce them.What to look for:
- Verify the complete kit contents, including stands and mounts.
- Check battery and power arrangements for the planned sessions.
- Plan light placement around the room and camera framing.
- Confirm the controls suit the crew’s workflow.
- Test the setup with presenters and the camera in position.
Godox LP600R 60W RGB LED Light Panel 2-Light Kit with Battery Power, Stand, Carr

This portable 2-light RGB LED kit includes high-quality panels with full color spectrum and adjustable temperature for professional video and streaming. It features multiple creative effects, dual power options, and app control for easy customization.
Pros:
- Full RGB spectrum and wide color temperature range for versatile lighting effects
- High brightness with 9270 lux at 0.5m and excellent color accuracy
- Wireless app control for easy adjustments and creative effects
- Portable kit with batteries, stands, and carrying case for on-location shoots
Cons:
- Primarily designed for indoor use; lightweight stands may be less stable outdoors
- Requires multiple NP-F batteries for extended mobile use
- Some users may find setup slightly complex due to multiple components
Best for: Studios looking for a listed two-light panel kit.
Not ideal for: Rooms without confirmed space, mounting, or power arrangements.
Bottom line: Check included accessories and rehearse placement in the actual studio before production.
Acoustic Panels
Acoustic panels are worth considering when room reflections make speech difficult to capture cleanly. Start by listening to the space during the kinds of segments you produce, noting echo, hard-surface reflections, and noise that persists between takes. Decide where presenters and microphones will be positioned before planning treatment. Room-specific needs should drive panel selection; a generic quantity or placement plan may not suit the room’s dimensions and surfaces. A common mistake is buying panels based only on appearance or a broad coverage estimate. Check each product’s dimensions, installation method, and suitability for the intended wall or ceiling location. Consider how treatment will fit around doors, windows, lights, and camera framing, and confirm that the mounting approach works with the room. Treat panels as one part of an audio plan: microphone placement and room noise still matter. Listen before and after any change from the same presenter position, and make adjustments based on what the recording reveals. If the problem is unclear, identify its source before deciding where treatment belongs.What to look for:
- Identify reflective or noisy areas through listening tests.
- Match panel dimensions and mounting to available surfaces.
- Plan placement around doors, windows, lights, and framing.
- Consider microphone position alongside room treatment.
- Compare recordings from the same position after installation.
Build the setup in a practical order: first confirm the signal path and core camera and switcher connections, then address microphone needs, presenter prompting, lighting, and room acoustics. Check compatibility and included accessories before each purchase so the production chain works as a whole.
Take the checklist one slot at a time, rehearse with the people who will use the equipment, and adjust based on what the studio needs. A few careful fit checks can make the final setup easier to operate and more consistent on air.
Fall Picks
fall essentials
As an affiliate, we earn on qualifying purchases.