
To install a garbage disposal, start by turning off the power and disconnecting the old drain. Remove the existing mounting hardware and set up the new assembly with plumber’s putty to seal the flange. Attach the disposal unit securely to the mounting ring, then connect the dishwasher hose and drain pipes, checking for leaks. Once everything is connected and secure, restore power and test the unit. If you follow the steps carefully, you’ll gain confidence and better understand the process.
Key Takeaways
- Turn off power and water supply before starting installation to ensure safety.
- Remove the old drain assembly, disconnecting all plumbing and electrical connections.
- Install the mounting assembly and secure the disposal unit with plumber’s putty for a watertight seal.
- Connect the dishwasher hose and plumbing fittings, then check for leaks after turning on water.
- Restore power, run the disposal briefly, and inspect all connections for proper operation and leak-free performance.
Installing a garbage disposal can seem intimidating, but with the right tools and instructions, you can do it yourself. Before you get started, it’s important to ensure your plumbing setup complies with local plumbing codes. This means checking that your current sink and drain align with regulations and that your electrical wiring is suitable for a garbage disposal unit. Proper plumbing code compliance not only keeps your installation safe but also helps prevent issues down the line. Additionally, if your home relies on a septic tank, consider septic tank maintenance before installing a new disposal, as certain models can increase solid waste entering the tank, leading to faster buildup and potential backups.
Once you’ve confirmed compliance and maintenance needs, gather the necessary tools: a screwdriver, pliers, a bucket, a plumber’s putty, and possibly a hacksaw. Turn off the power to your sink’s circuit at the breaker box to avoid electrical accidents. Next, disconnect the existing drain assembly by loosening the slip nuts and removing the drain pipes. Place a bucket underneath to catch any residual water. If you have an existing dishwasher, disconnect its drain hose from the sink or drain pipe, and prepare to connect it later to your new disposal if applicable.
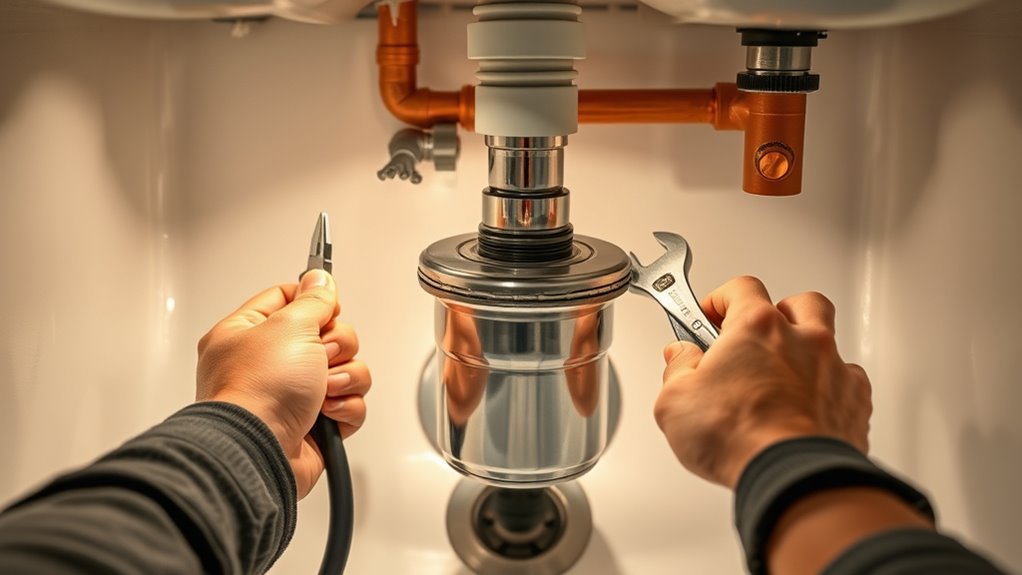
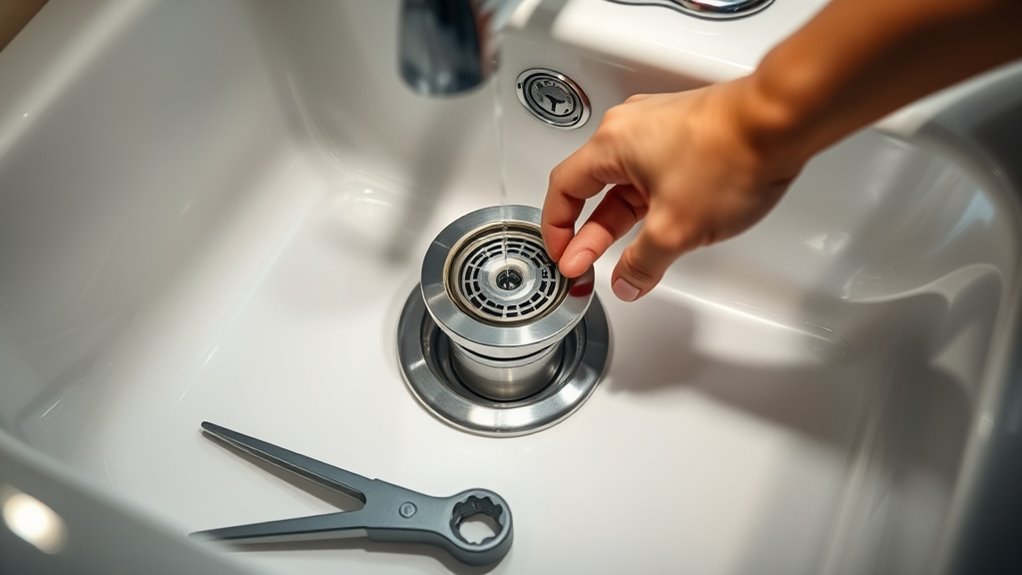
Now, remove the old sink stopper and any mounting hardware attached to the sink. Fit the mounting assembly for your new disposal onto the sink drain opening, applying plumber’s putty around the flange to create a watertight seal. Secure the mounting ring tightly under the sink, ensuring stability. Attach the disposal unit to the mounting assembly, following the manufacturer’s instructions, and tighten all connections securely. When connecting the dishwasher hose or other plumbing parts, make sure to use appropriate fittings and check for leaks.
Before powering up, double-check all connections for tightness and proper fit. Turn on the water supply and run water through the sink to test for leaks. If everything looks good, restore power and run the disposal briefly to ensure it operates smoothly. Remember, proper disposal installation includes considering septic tank maintenance; avoid overloading the system and only dispose of biodegradable waste. Regular inspection and maintenance of your septic tank will prevent backups caused by increased waste flow.
Additionally, selecting a model with a high contrast ratio can improve your experience by providing clearer and more vibrant images, especially in darker scenes. Following these steps not only helps you install your garbage disposal correctly but also ensures your plumbing stays compliant with local codes. Taking the time to prepare and check all connections will save you from costly repairs later and keep your system running efficiently. With patience and attention to detail, you can confidently upgrade your kitchen with a new garbage disposal that’s safe, compliant, and ready to handle your waste.
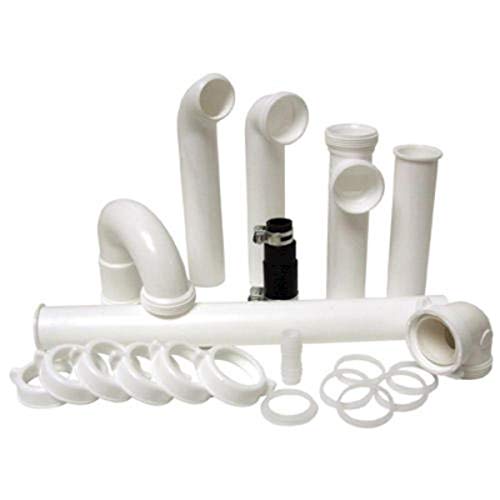
PF WaterWorks PF0989Garbage Disposal Installation KitWhite
INCLUDES EVERYTHING YOU NEED TO INSTALL A GARBAGE DISPOSAL
As an affiliate, we earn on qualifying purchases.
As an affiliate, we earn on qualifying purchases.
Frequently Asked Questions
How Long Does Installation Typically Take?
Installation typically takes about 1 to 2 hours, depending on your skill level and the complexity of your plumbing setup. You should consider labor considerations, as extra help might speed things up or be needed for tricky connections. If you’re experienced, you might finish sooner, but beginners should plan for some extra time to make sure everything is properly installed and functioning safely.
Can I Install a Garbage Disposal Myself?
Sure, you can tackle DIY plumbing and install a garbage disposal yourself—what’s the worst that could happen? Just remember, it’s not just about disposal maintenance, but also ensuring everything’s sealed tight. If you’re comfortable with basic tools and reading instructions, go for it. However, if leaks or electrical issues arise, you might want to call in a professional—they’re experts at avoiding plumbing mishaps.
What Tools Are Needed for Installation?
You’ll need a pipe wrench and screwdriver to install your garbage disposal. The pipe wrench helps loosen and tighten plumbing connections securely, ensuring a tight fit. The screwdriver is essential for removing and securing screws during the installation process. Additionally, you might need pliers, a drill, and plumber’s putty. Having these tools ready will make the installation smoother, allowing you to confidently complete the project yourself.
Is Electrical Wiring Required?
Did you know that improper electrical wiring causes around 20% of household electrical fires? Yes, electrical wiring is required for your garbage disposal’s power connection. You’ll need to connect it to a grounded outlet or install a dedicated circuit, depending on your setup. Make sure to turn off the power before working on wiring to stay safe. Proper wiring guarantees your disposal functions smoothly without electrical hazards.
How Do I Troubleshoot Installation Issues?
To troubleshoot installation issues, first check your plumbing connections to guarantee they’re tight and secure, preventing leaks. Verify disposal compatibility with your sink and mounting system. If the unit won’t turn on, confirm the electrical wiring is properly connected. Also, inspect the reset button on the disposal; pressing it might solve operational problems. Finally, consult the manufacturer’s guide for specific troubleshooting tips related to your model.

Harvey's WM Harvey 043010 Stainless Plumbers Putty, 14 oz
Will not support bacteria
As an affiliate, we earn on qualifying purchases.
As an affiliate, we earn on qualifying purchases.
Conclusion
Now that you know how to install a garbage disposal, you’re ready to take on the task with confidence. You’ve prepared, you’ve followed the steps, and you’re equipped to troubleshoot. You’ve learned to disconnect, connect, and secure. With each step, you’ve gained skills, confidence, and independence. So go ahead—install your disposal, enjoy the results, and keep your kitchen running smoothly. Because when you take action, you make your home better, safer, and more efficient.

8Pcs/Set Garbage Disposal Mount Sink Flange Kit and Stopper for Waste King, Garbage Disposal Drain Assembly Kit, Rubber Flange and Drain Lock Nut for Waste King, Whirlaway Parts (114mm) Model : 1030
Good Material : The assembly made of high-precision polished stainless steel , it is sturdy and durable ,and…
As an affiliate, we earn on qualifying purchases.
As an affiliate, we earn on qualifying purchases.

2 Set Dishwasher Connector Kit – Dishwasher Drain Hose Adapter with Inlet Connector, Hose Clamp, and Spring Clamps – Dishwasher Drain Connector Compatible with InSinkErator Garbage Disposals DWC-00
Transform your dishwasher's drain setup with the 2 Set Dishwasher Connector Kit – the ultimate dishwasher drain hose…
As an affiliate, we earn on qualifying purchases.
As an affiliate, we earn on qualifying purchases.