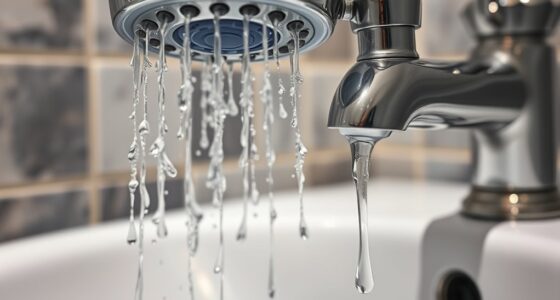

To fix a leaky outdoor faucet, start by turning off the water supply and draining any remaining water. Remove the handle and inspect the washer or O-ring for damage—replace if worn or cracked. Check the valve seat for corrosion, clean or replace it if needed. Apply pipe tape to threaded fittings for a tight seal. For more expert tips, you’ll discover how to make your repair last longer.
Key Takeaways
- Turn off the main water supply and drain the outdoor faucet to release pressure before starting repairs.
- Remove the handle and packing nut to access the valve stem for inspection.
- Check and replace worn washers or O-rings that cause leaks; match replacements to original parts.
- Clean or replace the valve seat if corrosion or damage is present for a proper seal.
- Apply pipe tape to threaded fittings before reassembling to ensure a tight, leak-free connection.

A leaky outdoor faucet can waste water and increase your utility bills, but fixing it is often a straightforward task. The first step is gathering the tools needed, which typically include a wrench, screwdriver, pliers, replacement washers or O-rings, and possibly pipe tape. Having these tools ready saves you time and makes the repair process smoother. Before diving into the fix, it’s helpful to understand the common causes behind a leaky outdoor faucet. Usually, leaks stem from worn-out washers, damaged O-rings, corroded valve seats, or loose fittings. Identifying the root cause helps you choose the right repair approach and prevents future leaks.
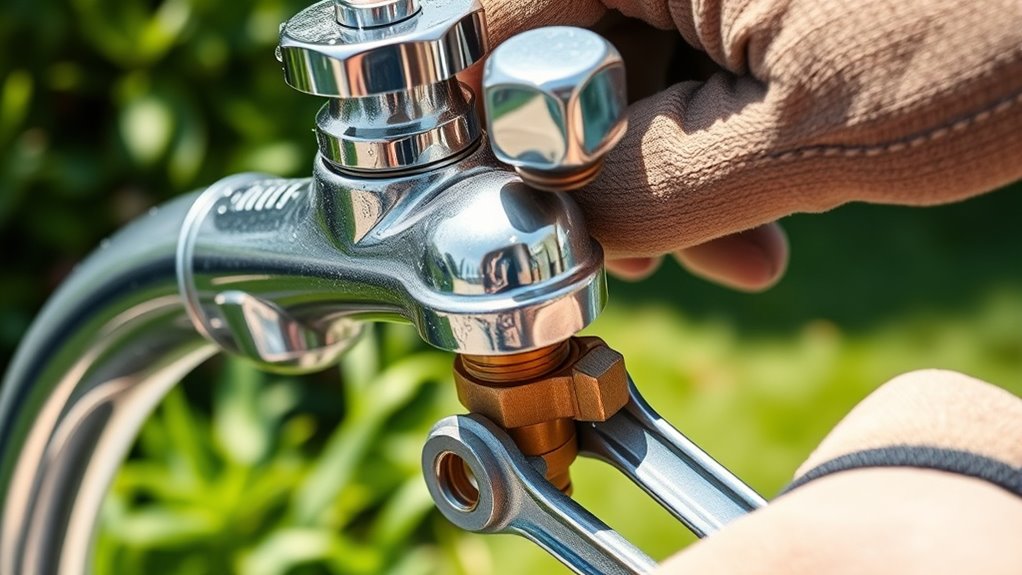
Start by turning off the water supply to the faucet. Usually, there’s a shutoff valve inside your house near the outdoor tap, or you may need to shut off the main water line. Once the water flow stops, open the outdoor faucet to drain any remaining water and relieve pressure. With the water off, use your wrench or pliers to loosen and remove the packing nut or retaining ring that holds the handle in place. Carefully lift off the handle, exposing the valve stem. You might see a washer or O-ring at the end of the stem—this is often the culprit if it’s cracked, hardened, or missing. Proper valve maintenance can help prevent leaks and extend the life of your faucet. Regular inspection and preventive care are essential to keep your outdoor plumbing functioning properly.
Turn off the water, drain the faucet, then remove the handle to access the valve stem.
Remove the old washer or O-ring, inspecting it for signs of wear or damage. If it’s deteriorated, replace it with a new one of the same size and type. For best results, take the old part to a hardware store to ensure the replacement fits perfectly. While you’re at it, check the valve seat—the area where the valve makes contact with the washer. If it’s corroded or rough, clean it gently with a wire brush or replace it if necessary. Applying a little pipe tape to threaded fittings can also help prevent leaks at connection points. Additionally, understanding proper sauna maintenance techniques can help prevent equipment leaks and prolong the lifespan of your plumbing system. Proper maintenance routines and proper maintenance can significantly reduce the likelihood of leaks developing over time.
outdoor faucet washer replacement kit
As an affiliate, we earn on qualifying purchases.
As an affiliate, we earn on qualifying purchases.
Frequently Asked Questions
Can I Fix a Leaky Outdoor Faucet Without Turning off the Water Supply?
You can attempt to fix a leaky outdoor faucet without turning off the water supply by carefully tightening the faucet handle or packing nut, but this might only be a temporary fix. For a more reliable repair, shut off the water to avoid flooding your garden hose or damaging your outdoor plumbing. Always guarantee the water is off before replacing washers or applying sealant to prevent further leaks and water waste.
What Tools Are Essential for Repairing a Leaky Outdoor Faucet?
You’ll need basic plumbing tools like an adjustable wrench, screwdrivers, and pliers to tackle the repair. It’s also helpful to have a repair kit, which includes replacement washers, O-rings, and packing nuts. These plumbing tools and repair kits make fixing a leaky outdoor faucet straightforward, allowing you to tighten fittings, replace worn parts, and stop the leak efficiently. Always keep these essentials handy for quick repairs.
How Long Does a Typical Outdoor Faucet Repair Take?
It usually takes about an hour to repair your outdoor faucet, so you’re not wasting time chasing your tail. This quick fix helps extend your faucet’s longevity and keeps repair costs down. If you stay organized and follow proper steps, you’ll have it up and running in no time. Remember, patience pays off—rushing can cause more issues, so take your time and do it right the first time.
Is It Necessary to Replace the Entire Faucet or Just the Washer?
You usually don’t need to replace the entire faucet; just replacing the washer often solves the leak. Start by inspecting the washer for wear or damage. If it’s worn out or torn, opt for washer replacement. However, if the faucet itself is corroded or cracked, then faucet replacement might be necessary. In most cases, a simple washer replacement is enough to fix leaks and save you time and money.
When Should I Consider Calling a Professional Plumber Instead of Fixing It Myself?
Just as you’re fixing that leak, a sudden burst or stubborn clog signals it’s time to call a professional plumber. If you encounter emergency repairs, complex plumbing, or feel unsure about turning off the water supply safely, don’t risk more damage—get expert help. You should consider a pro when the problem’s beyond simple washer replacements or if you notice corrosion, as they have the tools and experience for a safe, lasting fix.
outdoor faucet O-ring replacement
As an affiliate, we earn on qualifying purchases.
As an affiliate, we earn on qualifying purchases.
Conclusion
Now that you know how to fix your leaky outdoor faucet, you’ve taken control of the problem. Don’t let that drip turn into a flood of frustration—think of it as a small leak in your armor that you’ve just sealed. With a few simple steps, you’ve saved water, money, and headaches. Remember, a little maintenance now prevents a big mess later. You’ve got this—your faucet’s leak is no match for your quick, confident fix!
hose bib repair tools
As an affiliate, we earn on qualifying purchases.
As an affiliate, we earn on qualifying purchases.
outdoor faucet pipe tape
As an affiliate, we earn on qualifying purchases.
As an affiliate, we earn on qualifying purchases.