To add mood lighting in a room, start by turning off power at the circuit breaker and removing the existing switch. Take a picture of the wiring for reference, then connect the new dimmer switch following the manufacturer’s instructions, ensuring all connections are secure. Mount the dimmer, replace the cover plate, and restore power. Test the switch to adjust the brightness, creating the perfect ambiance. Keep exploring to discover more tips on customizing your lighting setup.
Key Takeaways
- Turn off power at the breaker and verify the circuit is de-energized for safety.
- Remove the existing switch and note wiring connections or take a photo for reference.
- Connect the dimmer switch wires securely to the existing wiring following manufacturer instructions.
- Secure the dimmer in the electrical box and replace the cover plate.
- Turn the power back on and test the dimmer to adjust brightness for desired mood lighting.

Installing a dimmer switch is a straightforward way to enhance your lighting control and create the perfect ambiance in any room. With a dimmer, you can easily adjust the brightness to suit your mood, whether you’re relaxing, entertaining, or working. This upgrade not only improves the atmosphere but also offers versatile lighting options that traditional switches can’t provide. Plus, it’s an affordable project that can be completed with basic tools and a little know-how.
Before you start, it’s essential to prioritize electrical safety. Turn off the power at your circuit breaker to prevent any risk of shock. Use a voltage tester to verify that the switch circuit is de-energized before handling any wiring. If you’re unfamiliar with electrical work, don’t hesitate to consult a professional. Proper safety precautions guarantee that your installation is both safe and compliant with local electrical codes. Remember, handling electrical components improperly can lead to shorts, fires, or personal injury.
Once the power is off, remove the existing switch cover and unscrew the switch itself. Take note of how the wires are connected—taking a photo can help you remember the setup later. Most modern dimmer switches are compatible with standard wiring configurations, but double-check the manufacturer’s instructions to confirm. When installing, connect the dimmer’s wires to the existing wires following the provided diagram, ensuring all connections are tight and secure. If your home has a three-way switch setup, make sure to select a compatible dimmer designed for three-way operation. This allows you to control the same light from multiple locations, adding convenience and flexibility.
After wiring, carefully tuck the wires back into the electrical box and secure the dimmer switch in place. Replace the cover plate, turn the power back on at the breaker, and test your new dimmer. You’ll find that adjusting the slider or dial lets you smoothly transition from bright to dim lighting, giving you complete control over your room’s ambiance. With the right dimmer switch, you can customize lighting options to match any activity or mood, from a vibrant dinner gathering to a cozy movie night. Additionally, understanding the navigation and mapping features of smart switches can help you integrate your dimmer into a smart home system for even more control and automation.

Lutron Diva LED+ Dimmer Light Switch for Dimmable LED, Halogen, and Incandescent Bulbs with Wallplate, 150 Watt, Single-Pole or 3-Way, DVWCL-153PH-WH, White
Installs in as little as 15 minutes with Lutron dimmer switch for LED lights in homes of all…
As an affiliate, we earn on qualifying purchases.
As an affiliate, we earn on qualifying purchases.
Frequently Asked Questions
Can Dimmer Switches Be Used With LED Bulbs?
Yes, you can use dimmer switches with LED bulbs, but you need to guarantee LED compatibility. Not all dimmer types work well with LEDs, so look for dimmers specifically designed for LED compatibility. These dimmer switches help prevent flickering and buzzing. Always check the packaging or specifications to confirm the dimmer’s compatibility with your LED bulbs, ensuring smooth dimming and reliable performance for your mood lighting.
What Tools Are Needed for Installing a Dimmer Switch?
You’ll need a screwdriver, voltage tester, wire strippers, and possibly a drill. If you’re installing a wireless dimmer or smart dimmer, make certain you have Wi-Fi access and the compatible app ready. Turn off power before starting, then carefully connect the wires according to the instructions. Using a voltage tester helps verify power is off. With these tools, installing your dimmer switch becomes straightforward, allowing you to enjoy customizable mood lighting effortlessly.
Is a Dimmer Switch Compatible With All Light Fixtures?
Not all light fixtures are compatible with dimmer switches. You need to check fixture compatibility, especially with LED, CFL, or incandescent bulbs. Different dimmer types suit specific bulbs, so make certain you select a compatible dimmer for your fixture. For example, LED-compatible dimmer switches work well with most modern bulbs, while older dimmer types might not. Always verify the manufacturer’s instructions to avoid flickering or damage.
How Do I Prevent Flickering With My Dimmer Switch?
To prevent flickering with your dimmer switch, guarantee bulb compatibility by using dimmable bulbs designed for dimmer switches. Follow installation tips carefully, such as turning off power before wiring and double-checking connections. Avoid mixing different bulb types or wattages, as this can cause flickering. If flickering persists, consider upgrading your dimmer switch to one compatible with LED or CFL bulbs. Proper installation and compatible bulbs make a big difference.
Can I Install a Dimmer Switch Myself or Need a Professional?
Did you know nearly 70% of homeowners opt for professional assistance when installing dimmer switches? While DIY installation can be straightforward if you’re comfortable with electrical work, it’s often safer and more reliable to hire a professional. They ensure proper wiring and code compliance, preventing issues like flickering or electrical hazards. If you’re confident in your skills, follow clear instructions, but don’t hesitate to seek advice from a pro for complex setups.
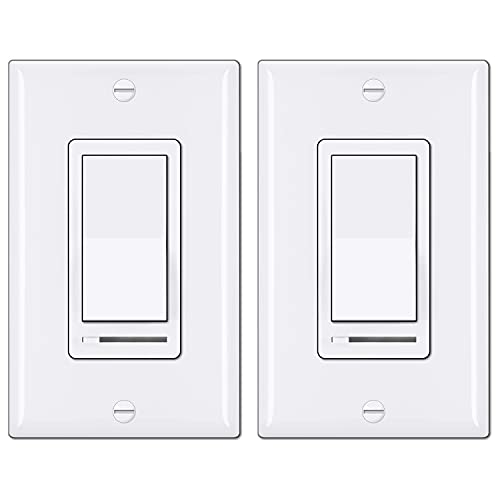
BESTTEN 2 Pack Dimmer Light Switch, Universal Lighting Control, Single Pole or 3 Way, Compatible with LED Dimmable Lamp, CFL, Incandescent, Halogen Bulb, Decorator Wallplate Included, UL Listed, White
Eliminate Flickering: NOTE: This dimmer has an adjustable dimming range. Please rotate the SIDE ADJUSTMENT WHEEL to eliminate…
As an affiliate, we earn on qualifying purchases.
As an affiliate, we earn on qualifying purchases.
Conclusion
Now that you’ve installed your dimmer switch, you can effortlessly switch from bright daytime energy to cozy evening ambiance. It’s funny how a simple adjustment can transform a room’s mood—like turning on a new personality. Just like tuning a guitar, a small twist creates harmony and comfort. So, enjoy controlling your lighting, and remember, sometimes the tiniest change makes the biggest difference in how you feel at home.

Amazon Basics Smart Dimmer Switch, Single Pole, Works with Alexa Only, Voice Control, 2.4 GHz Wi-Fi, No Hub Required, Neutral Wire Required, White
SMART UPGRADE: Works with Alexa to add voice control to your home; an easy upgrade from your traditional…
As an affiliate, we earn on qualifying purchases.
As an affiliate, we earn on qualifying purchases.
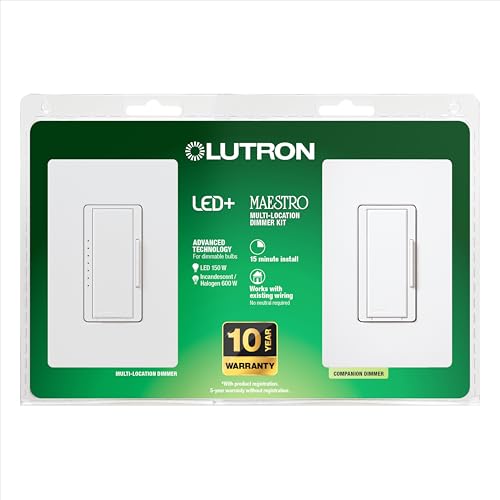
Lutron Maestro Dimmer Switch LED+ Digital Dimmer Kit for Dimmable LED, Halogen, and Incandescent Bulbs, 150-Watt, Multi-Location, MACL-153M-RHW-WH, White
LED dimmer switch for use in 3-Way dimming applications
As an affiliate, we earn on qualifying purchases.
As an affiliate, we earn on qualifying purchases.