
TL;DR
A closet can work as a vocal booth if you focus on placement, reflection control, and proper ventilation. Foam alone won’t cut it; sealing gaps and strategic positioning matter more than you’d think. Proper planning transforms tiny spaces into effective, budget-friendly sound zones.
Ever wonder if your cramped closet could become a decent vocal booth? It can — with the right tweaks. Most folks focus on stuffing foam everywhere, but the truth is, the magic lies in where you put things, how you treat reflections, and sealing gaps.
Whether you’re recording vocals, streaming, or just want some quiet space, understanding the balance between dampening, placement, and isolation is key. This guide unlocks the secrets to turning tiny, echo-prone closets into usable, affordable sound zones — no fancy studio required.
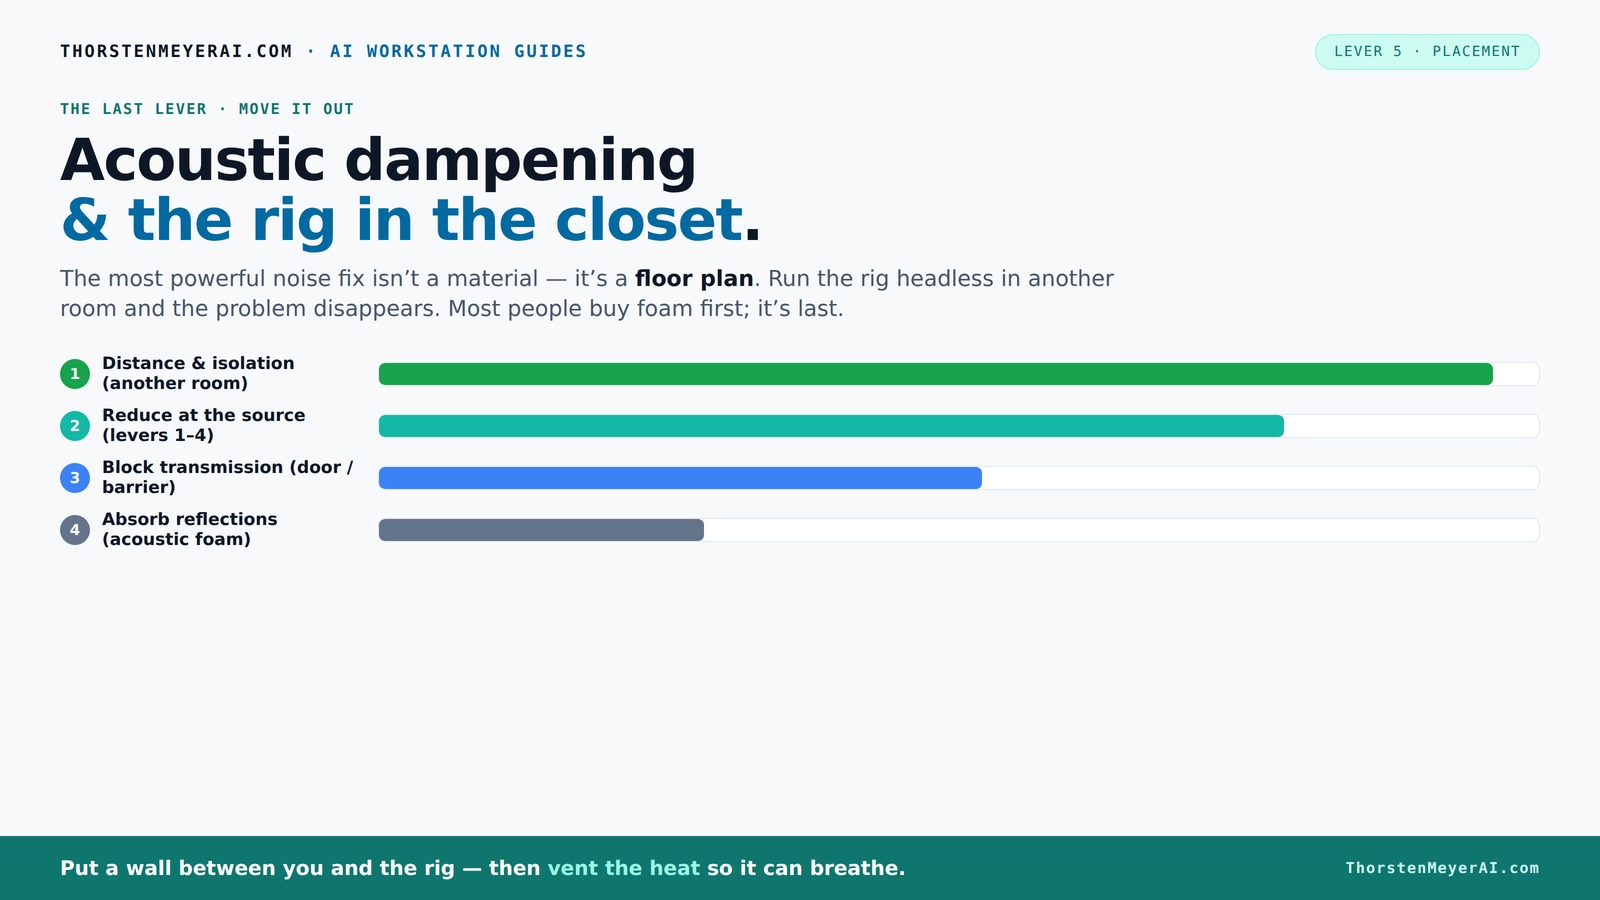
Acoustic dampening
& the rig in the closet.
The most powerful noise fix isn’t a material — it’s a floor plan. A rig you can’t hear because it’s in another room beats any amount of foam. Tap the approaches in Part 1 to see what actually works.
(another room)
(levers 1–4)
(door / barrier)
(acoustic foam)
Contain the noise, not the heat
Key Takeaways
- Prioritize placement and reflection control over adding foam; positioning your mic correctly makes a huge difference.
- Seal all gaps and cracks around the closet door and vents to prevent sound leaks.
- Use layering — blankets, foam, rugs — to boost absorption without overspending on single materials.
- Ventilate your closet properly to prevent heat buildup, especially if placing a high-power rig inside.
- Bass trapping in corners dramatically improves low-end clarity in small spaces.
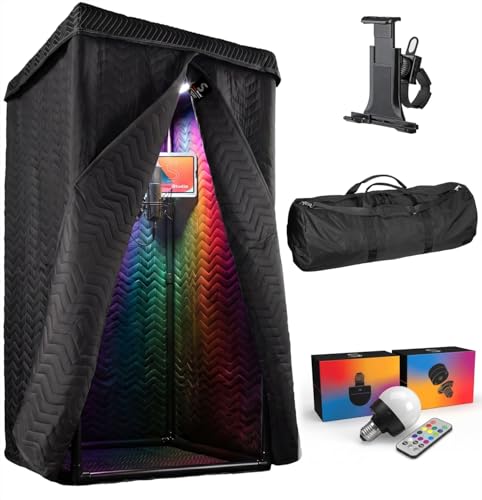
'Snap Studio' XL Portable Recording Booth | '#1 Vocal Booth' Rolling Stone | Record Crisp Dry Echo-Free Vocals at Home or On-The-Road | The Original & Best Studio Booth, Trusted By Singers & Voiceover
#1 Recommended Portable Recording Booth — Featured by Rolling Stone Magazine as the “best sound booth”, Snap Studio’s...
As an affiliate, we earn on qualifying purchases.
As an affiliate, we earn on qualifying purchases.
Why Reflection Control and Placement Outweigh Foam
Acoustic dampening isn’t just about slapping foam on the walls. It’s about controlling how sound bounces inside the space and where your microphone sits. Foam absorbs echoes and reduces reverberation, but if you don’t position your mic correctly or treat the right spots, the sound won’t improve much.
Imagine a tiny closet with hard, flat walls. Without proper placement, your voice echoes off the walls, creating a hollow, boomy sound. But if you position your mic close to your mouth and aim it away from reflective surfaces, you cut down on harsh reflections instantly. Then, treating the wall directly behind the mic and the ceiling can tame the biggest reflection points, making your recordings clearer.
Reflection control and strategic placement matter because they directly influence the clarity and warmth of your recordings. Misplaced microphones or untreated reflective surfaces can amplify echoes, muddying your sound and requiring more aggressive and often unnecessary foam coverage. By understanding where reflections originate, you can target your treatment efficiently, avoiding the trap of over-foam and focusing on what truly improves quality. The tradeoff is that proper placement often yields better results with less material, saving time and money while producing a cleaner, more professional sound. For more tips, visit home improvement resources.

Focusound 52 Pack Acoustic Foam Panels 1" x 12" x 12" Sound Proof Foam Panles Soundproofing Noise Cancelling Wedge Panels for Home Office Recoding Studio with 300PCS Double-Side Adhesive
Soundproofing - Acoustic foam panels triangular grooves structure for better noise absorption, helps to reduce and absorb unwanted...
As an affiliate, we earn on qualifying purchases.
As an affiliate, we earn on qualifying purchases.
The “Rig in the Closet” Setup — How to Make It Work Without Cooking Your Equipment
Putting your high-power rig in a closet sounds clever — away from your ears and quiet. But here’s the catch: sealed spaces trap heat. A GPU pulling 600W of heat in a tiny closet without airflow can turn into a literal oven.
To keep your rig cool and quiet, you need airflow. Passive vents help, but a quiet exhaust fan is better. Some builders install small, purpose-built soundproof cabinets with ducted airflow and temperature control. This way, your rig stays cool while remaining silent to your ears.
Effective ventilation isn’t just about comfort; it directly impacts hardware longevity and performance. Overheating can throttle your GPU and CPU, leading to crashes or long-term damage. The tradeoff is balancing noise reduction with airflow. Using ducted fans or vented enclosures can preserve silence while providing sufficient cooling, but improper setup may still allow heat buildup or noise leaks. For more on home tech solutions, check out home improvement guides.

118” Wedge-Shape Foam Window Weather Stripping Door Seal Strip,Soundproofing Frame Winter Insulation Tape for Exterior Front Door,Noise Cancelling Window Inserts,Door Gap Filler Light Blocker,White
Upgraded Wedge Design: This window draft stopper features an upgraded wedge design, tapering from 5/32" to 11/32" (0.16"–0.35")...
As an affiliate, we earn on qualifying purchases.
As an affiliate, we earn on qualifying purchases.
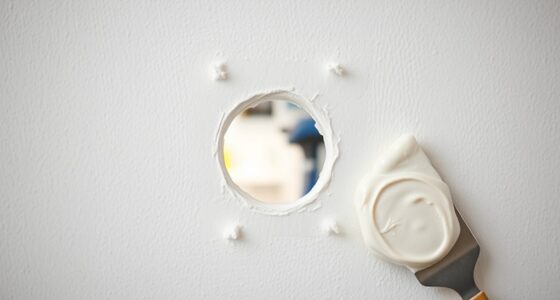
How to Seal Gaps and Block Sound Leaks in Your Closet
Gaps around the door, cracks in the corners, and vent openings are the weak points where sound escapes. Sealing these makes a dramatic difference. Use weatherstripping around the door frame, foam tape for cracks, and acoustic sealant for larger gaps. For more detailed sealing techniques, see this guide on acoustic sealing.
For example, sealing the closet door with a high-quality door sweep and weatherstripping can cut noise leakage by over 50%. Covering small vent openings with soundproof ducting or adding a blanket over the door during recording sessions further reduces leaks.
But sealing isn’t just about stopping noise — it also prevents sound leaks that can compromise your acoustic treatment. If sound escapes, it can bounce back into the room or be picked up by other microphones, creating a feedback loop or background noise. The tradeoff is that overly sealed spaces can trap heat or moisture, so it's crucial to find a balance—use effective sealing materials while ensuring proper ventilation. DIY solutions like mass-loaded vinyl or draft stoppers can be effective, but they must be applied carefully to avoid creating new reflective surfaces or trapping heat. Properly sealed gaps enhance isolation, making your treatment more effective and your recordings cleaner.

Sound Addicted - Studio Monitor Isolation Pads for 5 Inch Monitors, Pair of Two High Density Acoustic Foam which Fits Most Speaker Stands | SMPad 5
SMPad 5 is made out of the highest quality acoustical foam (50kg/m^3 density).
As an affiliate, we earn on qualifying purchases.
As an affiliate, we earn on qualifying purchases.
Layering Treatment: Combining Materials for Real Results
One layer of foam won’t turn a closet into a professional studio. Instead, layering different materials boosts absorption and reduces reflections more effectively. Think thick blankets, acoustic panels, rugs, and even moving blankets.
For example, using a dense acoustic foam panel on the wall behind your mic, layered with a soft blanket on the door, and a rug on the floor creates a multi-layered barrier against echo and sound leakage. This approach is budget-friendly and adaptable.
Layering is effective because different materials target different frequencies and reflection points. Thick, dense materials absorb low frequencies, while softer, porous items like blankets or rugs help with mid and high frequencies. The tradeoff is that layering can sometimes reduce room size or make the space feel cramped, so placement and choice of materials should be balanced. For more ideas on effective treatment layering, visit this resource.
Bass Traps and Low-End Control in Tiny Closets
Low-frequency buildup is sneaky in small, parallel-walled spaces. Bass traps placed in corners can help tame the boomy, muddy sound. Without them, your recordings may sound hollow or muffled at low end. To learn more about bass trapping, see this guide on bass traps.
In a tiny closet, a simple DIY bass trap can be made from rockwool or thick foam tucked into the corners. For larger, more professional setups, commercial bass traps can be installed in the ceiling corners or along the walls, absorbing those problematic frequencies.
Low-end issues are often the most challenging because they tend to resonate and amplify in small, enclosed spaces. Without proper bass trapping, your recordings will suffer from uneven frequency response, making mixes sound unbalanced. The tradeoff is that bass traps require strategic placement—usually in corners where low frequencies tend to accumulate—and may take up valuable space. Effective bass trapping improves clarity and balance, and in small rooms, it’s often a necessary investment to achieve a professional sound. Neglecting low-end control can result in a muddy, boomy mix that’s hard to correct later, so incorporating bass traps is a crucial step in small-space acoustic treatment.
Practical Tips for a Budget DIY Closet Studio
Creating a functional closet studio doesn’t mean breaking the bank. Use thick blankets, pillows, and rugs to absorb reflections. Seal gaps with weatherstripping or foam tape. Place your mic close to your mouth and aim it away from reflective surfaces.
Invest in a decent microphone stand, some acoustic panels, and a good quality foam for reflection points. Ventilation can be as simple as a small fan or a vent hole, just enough to prevent overheating.
For example, one DIY enthusiast used moving blankets, a door draft stopper, and a small computer fan to keep his setup cool and quiet on a tight budget. It’s all about layering and smart placement.
Budget-friendly tips include repurposing household items—like using a thick blanket draped over a chair or a pile of pillows behind the mic to diffuse sound. The key is understanding that layering and proper placement often outperform expensive gear. Proper ventilation, even with a small fan, prevents overheating and hardware failure, which are risks in enclosed, poorly ventilated spaces. With creative use of affordable materials, you can craft an effective, quiet, and functional closet studio without overspending.
Frequently Asked Questions
Can a closet really work as a vocal booth?
Yes, a closet can become a functional vocal booth if you focus on reflection control, sealing gaps, and proper mic placement. Small rooms naturally boost reflections, so treating those key points makes all the difference.
Is acoustic foam enough, or do I need blankets and panels too?
Acoustic foam helps with echoes and reflections, but layering with blankets, rugs, and soft furnishings provides broader absorption. Combining materials yields the best results for small spaces.
Where should I position the microphone in a closet setup?
Place the mic close to your mouth, aiming away from reflective surfaces like walls or the door. Treat the wall behind the mic and the ceiling to reduce echoes and improve clarity.
Should I treat the walls, ceiling, or door first?
Start with the reflection points closest to the mic — usually the wall behind you and the ceiling. Seal the door and gaps afterward to improve isolation.
Do bass traps matter in such a small space?
Absolutely. Corner bass traps help tame low-frequency buildup, making your recordings sound fuller and more balanced. In tiny spaces, it’s often a must-have.
Conclusion
The best soundproofing for a closet isn’t just about foam — it’s about smart placement, sealing gaps, and ventilation. When you treat the reflection points, block leaks, and keep things cool, that tiny space transforms into a surprisingly effective recording zone.
Remember: a closet isn’t a perfect studio, but with a little planning, it can punch well above its weight — quiet, warm, and ready for your voice or gear. The trick is to think of it as a layered system, not just a foam box.