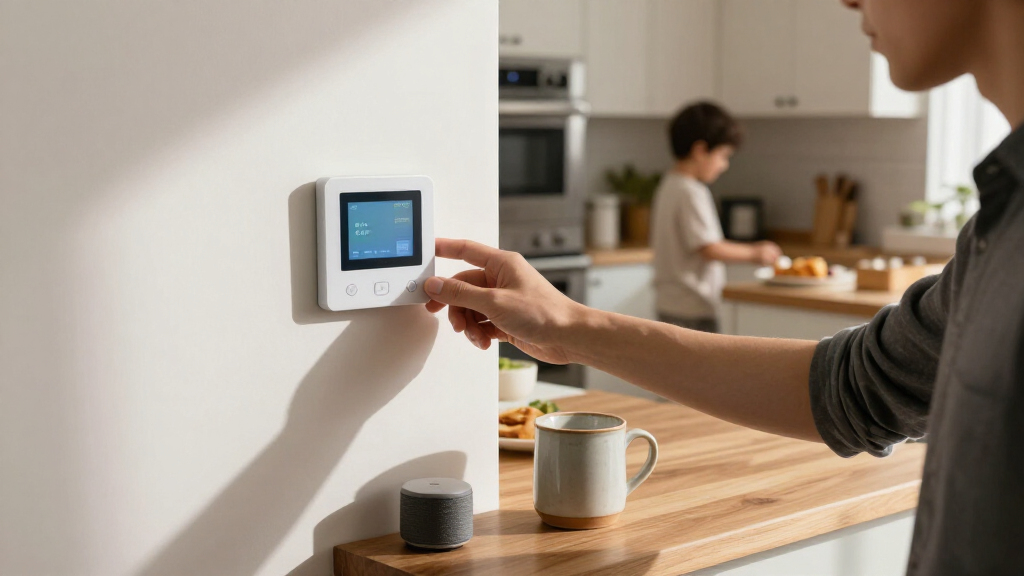

Set up a smart home device by checking its requirements, connecting it to your Wi-Fi, adding it in the manufacturer’s app, and testing its controls. This guide is for beginners setting up a compatible bulb, plug, speaker, thermostat, camera, or similar device. Allow about 20-45 minutes per device; more complex products may take longer.

Get everyday essentials delivered free with Prime
- Fast, free delivery on millions of items
- Prime Video, Amazon Music and more included
- Member-only deals all year

Amazon Echo Show 15, 15.6-Inch Full HD Smart Display with Fire TV and Alexa
- ✔ Display: 15.6-inch Full HD (1080p)
- ✔ Voice assistant: Alexa
- ✔ Entertainment: Built-in Fire TV; remote included

Kasa Smart Wi-Fi Plug HS103P4, 4-Pack, 15A, White
- ✔ Model: HS103P4
- ✔ Package quantity: 4 plugs
- ✔ Operating voltage: 120 V AC

2-Inch Smart RGB LED Recessed Downlight, 5W, Wi-Fi, Dimmable, 1-Pack
- ✔ Light type: Canless recessed LED downlight
- ✔ Diameter: 2 inches
- ✔ Wattage: 5W
Difficulty: Beginner | Time: 20-45 minutes per device
What You’ll Need
Tools & Materials:
- Smart home device and its power adapter or batteries
- Phone or tablet with the manufacturer’s app installed
- Home Wi-Fi name and password
- Device setup instructions or QR code
Knowledge:
- Basic ability to install an app and connect a phone to Wi-Fi
- Access to the home Wi-Fi network and permission to change its settings if needed
Check the device box or manufacturer’s website for supported Wi-Fi bands, hubs, operating systems, and regional compatibility. Many devices require 2.4 GHz Wi-Fi; some newer models support 5 GHz or use a separate hub. Keep your phone near the router and device during setup. For mains-powered equipment, follow the manufacturer’s safety instructions and switch off power at the breaker when required.
Amazon Echo Show 15, 15.6-Inch Full HD Smart Display with Fire TV and Alexa
Among these three picks, the Echo Show 15 makes the strongest central control point because it combines a large screen with Alexa voice control and a dashboard for household information. Its 15.6-inch Full HD display gives calendars, widgets, and live camera feeds room to be seen across a shared space. That makes it better suited to a kitchen or family area than the Kasa plugs, which automate appliances but have no shared visual interface.Fire TV and the included remote extend its role beyond home control, while the camera’s auto-framing, 3.3x zoom, and noise reduction support video calls. Those extras are useful if we want one prominent device to handle several household routines. They also make it a bigger commitment in placement and screen presence than either a plug or a recessed light. Some streaming services may require subscriptions, and its smart home controls depend on having compatible devices to connect.Privacy controls are a practical consideration for a camera-equipped display: it includes a microphone and camera-off button and a built-in camera shutter. Buyers who want a simple, low-profile automation upgrade may be better served by the Kasa four-pack. We would choose the Echo Show when a visible, shared Alexa interface and entertainment are part of the goal, rather than expecting it to make incompatible devices smart.
Pros:
- Large 15.6-inch Full HD screen for household widgets and controls
- Fire TV and remote add entertainment without a separate display
- Auto-framing camera with 3.3x zoom and noise reduction for calls
- Camera shutter and microphone/camera-off button provide direct privacy controls
Cons:
- Some streaming services may require a subscription
- Smart home control depends on compatible connected devices
- The large screen needs a visible, dedicated placement
Best for: Households that want a prominent Alexa dashboard for calendars, compatible smart devices, camera feeds, calls, and streaming.
Not ideal for: Buyers seeking discreet, inexpensive appliance automation, or those without compatible devices and a suitable place for a large display.
Bottom line: Choose the Echo Show 15 when we want the broadest shared interface in this lineup, with the tradeoff of a prominent screen and dependence on compatible devices.
“Choose the Echo Show 15 when we want the broadest shared interface in this lineup, with the tradeoff of a prominent screen and dependence on compatible devices.”
Kasa Smart Wi-Fi Plug HS103P4, 4-Pack, 15A, White
For a household that already owns ordinary lamps, fans, or other compatible appliances, the Kasa Smart Wi-Fi Plug four-pack offers the most direct way to add schedules and remote switching. Each plug connects through 2.4 GHz Wi-Fi, works with Alexa or Google Assistant, and does not require a hub. That keeps the setup simpler than adding a dedicated control system, while four plugs let us automate more than one room or device at a time.Its role is narrower than the Echo Show 15: Kasa does not provide a display, video calls, or entertainment. Instead, it changes when a plugged-in device receives power, which makes it a practical fit for lamps and appliances that suit that kind of control. It also differs from the recessed downlight, which offers fine control over the light’s color and dimming but addresses a single installed fixture. The plugs are a better starting point when our priority is scheduling existing equipment rather than changing the lighting itself.The main check is the network. These plugs require 2.4 GHz Wi-Fi, so a buyer should confirm that their router and setup support the required band. They also depend on the connected appliance being compatible with remote power switching. UL certification and a stated 15A rating add useful purchase details, but they do not remove the need to check the appliance’s requirements. If we want one polished household screen, the Echo Show is the more complete interface; for basic multi-device automation, Kasa is the most practical pick here.
Pros:
- Four plugs let us automate multiple compatible devices
- Works with Amazon Alexa and Google Assistant
- Remote control, timers, and schedules through the Kasa app
- No hub required; UL certified
Cons:
- Requires a 2.4 GHz Wi-Fi connection
- Controls power to compatible plugged-in devices rather than their full feature set
- Does not provide the display and household dashboard of the Echo Show 15
Best for: Buyers who want to schedule or remotely switch several compatible lamps and appliances using Alexa, Google Assistant, or the Kasa app.
Not ideal for: Homes without a usable 2.4 GHz Wi-Fi connection, or buyers who want detailed lighting effects or a central visual dashboard.
Bottom line: Pick Kasa for straightforward, hub-free schedules across compatible appliances, provided the home has 2.4 GHz Wi-Fi.
“Pick Kasa for straightforward, hub-free schedules across compatible appliances, provided the home has 2.4 GHz Wi-Fi.”
2-Inch Smart RGB LED Recessed Downlight, 5W, Wi-Fi, Dimmable, 1-Pack
This 2-inch smart downlight is the most specialized choice in the roundup. It offers RGB color, six white color temperatures from 2700K to 6000K, and stepless dimming from 10% to 100%. Those adjustments make it more expressive than using a Kasa plug with a conventional lamp: we can change the fixture’s light itself, then schedule or group it through the Smart Life app. For a suitable recessed installation, that can make the room easier to adapt for different activities.Compared with the Echo Show 15, the downlight is a focused lighting component rather than a household interface. It will not organize calendars or display camera feeds, and the package contains one light rather than a multi-device control point. Its 2-inch format can suit compact openings, but buyers need to measure carefully: the stated cutout range is 2.28–2.56 inches, with a 2-3/8-inch cutout specified. This fit check matters more here than with a plug that uses an existing outlet.Setup also brings more conditions than the Kasa option. The light needs 2.4 GHz Wi-Fi and the Smart Life app, and the supplied details say that a wall dimmer and extension wire for junction-box connections are not included. We should check the existing wiring and installation needs before choosing it. Its 5W LED is described as replacing a 35W halogen bulb, but its single-light package and installation requirements make it a better project for targeted lighting than a broad first step into smart home control.
Pros:
- RGB colors and six white color temperatures from 2700K to 6000K
- Stepless dimming from 10% to 100%
- Smart Life app supports group control, schedules, and timers
- Compact canless design; described as a 35W halogen replacement
Cons:
- Requires 2.4 GHz Wi-Fi and the Smart Life app
- Wall dimmer and extension wire for junction-box connections are not included
- One light per package, with opening dimensions to verify
Best for: Buyers upgrading a compatible recessed opening who want app-based RGB color, adjustable white light, dimming, and schedules.
Not ideal for: Anyone seeking plug-and-play appliance control, a multi-light package, or a fixture that avoids measuring and installation checks.
Bottom line: Choose this downlight for tailored smart lighting in a compatible recessed opening, after checking the cutout and installation requirements.
“Choose this downlight for tailored smart lighting in a compatible recessed opening, after checking the cutout and installation requirements.”
As an Amazon Associate we earn from qualifying purchases.
Before You Start
Pick a location with reliable Wi-Fi and access to power. If you are setting up several devices, connect and test one before starting the next so setup problems are easier to isolate. Use a strong, unique password for your account, and do not share Wi-Fi or account credentials in public. Some devices need a hub or a compatible voice assistant; confirm that requirement before opening the setup process.
Step-by-Step Instructions
Step 1: Check the device requirements
Read the quick-start guide or product page. Confirm the required app, Wi-Fi band, hub, phone operating system, and account type. Check that the device is supported in your country and that you have any required accessories.
Tip: If your router combines 2.4 GHz and 5 GHz under one network name, check the device instructions. Some setup processes need the phone to join the 2.4 GHz band temporarily.
Check: You know which app and network the device needs, and you have the required hub or accessories.
Step 2: Install and power the device
Place or install the device where you intend to use it, following the supplied instructions. Plug it in, insert batteries, or restore power as directed. Wait for its indicator light or screen to show that it is ready for setup.
Tip: Do not place a camera, speaker, or other device where it can be exposed to water or heat unless it is rated for that location.
Check: The device powers on and displays the setup state described in its instructions.
Step 3: Install the manufacturer’s app
Download the app named in the device instructions from your phone’s official app store. Open it, create an account or sign in, and grant only the permissions needed for setup, such as Bluetooth or local network access.
Tip: Check the app publisher before installing it. Similar app names can belong to unrelated products.
Check: The app opens to its home screen, and you can sign in to the account you intend to use for this device.
Step 4: Add the device in the app
In the app, choose the option to add or set up a device. Select the correct product category and model, then scan its QR code or enter its setup code if requested. Follow the on-screen pairing instructions.
Tip: Keep the phone close to the device. If pairing fails, use the reset procedure in the product instructions before trying again; a reset may erase existing settings.
Check: The app identifies the device and advances to network setup or displays it in your device list.
Step 5: Connect it to Wi-Fi or its hub
Select your home network in the app and enter the Wi-Fi password, or follow the instructions to pair the device with its hub. Wait for the app to finish connecting before closing it. If prompted, keep your phone on the same Wi-Fi network during setup.
Tip: Enter the password exactly, including capital letters and symbols. Avoid guest networks that block communication between devices unless the manufacturer says they are supported.
Check: The app reports that setup is complete or shows the device as online.
Step 6: Name the device and set its location
Give the device a short, recognizable name such as “Hallway lamp” or “Kitchen speaker.” Assign it to the correct room in the app. Use names that are easy to distinguish if you plan to add voice control.
Tip: Avoid giving multiple devices nearly identical names; voice assistants may choose the wrong one.
Check: The device appears in the correct room with a clear name.
Step 7: Test the main control
Use the app to turn the device on and off or operate its primary function. For a thermostat, check that the displayed temperature and mode make sense. For a camera, view its live feed while you are on the home network.
Tip: Some actions have a short delay. Wait a few seconds before repeating a command so you do not send conflicting instructions.
Check: The device responds to the app and returns to an accurate status in the app.
Step 8: Set up voice control or automations if needed
If you want voice control, link the manufacturer’s service to your chosen assistant using the assistant’s app and follow its account-linking steps. For an automation, start with one simple rule, such as turning on a light at a set time, then save and test it.
Tip: Review each automation’s schedule, room, and trigger before enabling it. Avoid rules that could create repeated on-off cycles.
Check: A voice command or test automation controls the intended device, if you set one up.
Common Mistakes to Avoid
- Trying to pair a device on an unsupported Wi-Fi band. — Check the device’s network requirements first and connect the phone to the required band during setup.
- Entering an incorrect Wi-Fi password or selecting a guest network. — Check the network name and type the password carefully. Use the main home network unless the product supports the guest network.
- Placing the device where the wireless signal is weak. — Test setup near the router, then move the device to its intended location and check that it remains online.
- Using vague or duplicate device names. — Choose short names that describe the room and function, especially if you use voice commands.
Troubleshooting
Problem: The app cannot find the device.
Solution: Check that the device is powered and showing its pairing indicator. Enable the requested Bluetooth or local network permission, move the phone closer, and restart the app. If it was paired before, follow the manual’s reset steps and try adding it again.
Problem: The device rejects the Wi-Fi connection.
Solution: Recheck the network name and password, confirm the supported Wi-Fi band and security type, and move the device nearer the router. Restart the router only if other devices also have connection trouble.
Problem: The device connects but later appears offline.
Solution: Check the signal at its installed location and confirm that the router has not changed its network name or password. Restart the device, update its firmware in the app, and consult the manufacturer’s guidance if it repeatedly disconnects.
Problem: Voice control or an automation does not work.
Solution: Confirm that the manufacturer account is linked to the assistant, the device is online, and its room and name are correct. Test control in the manufacturer’s app first, then review the assistant’s routine or automation settings.
What Success Looks Like
The device appears online in its app, has a recognizable name and correct room, and responds consistently to its primary control. If you added voice control or an automation, a test command or trigger operates the intended device. Check the device again from its normal location after setup to confirm it stays connected.
Next Steps
Install firmware updates when the app offers them, review account security and sharing settings, and keep the setup instructions for future resets. Add additional devices one at a time and test each before building larger routines. If a device controls heating, locks, alarms, or other safety-related systems, review its manual and test its local controls as well as app access.
Frequently Asked Questions
Do smart home devices need internet access?
Many rely on internet access for remote control, voice assistants, or cloud features. Some can still work locally through a hub or local network. Check the product details to see which functions remain available when the internet is down.
Can I use devices from different brands together?
Sometimes. Check for a shared platform or standard supported by both products, such as the same voice assistant or Matter. Each device may still require its own manufacturer app for setup, updates, or advanced settings.
Why does my device only support 2.4 GHz Wi-Fi?
Some devices use 2.4 GHz because it can reach farther through walls and supports low-bandwidth tasks. Follow the product instructions for pairing; do not change router settings unless you understand how the change affects other devices.
Should I reset a device before trying setup again?
Reset it only if the app cannot reconnect or the manufacturer’s troubleshooting steps recommend it. A factory reset can remove network details, schedules, and other settings, so check the instructions first.
Fall Picks
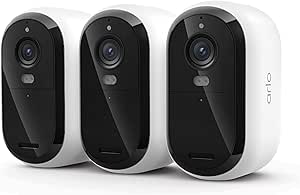
Arlo Essential Wireless Security Camera 2K (3rd Gen) – 3-Cam Kit with Yard Sign
As an affiliate, we earn on qualifying purchases.